
Side Dishes
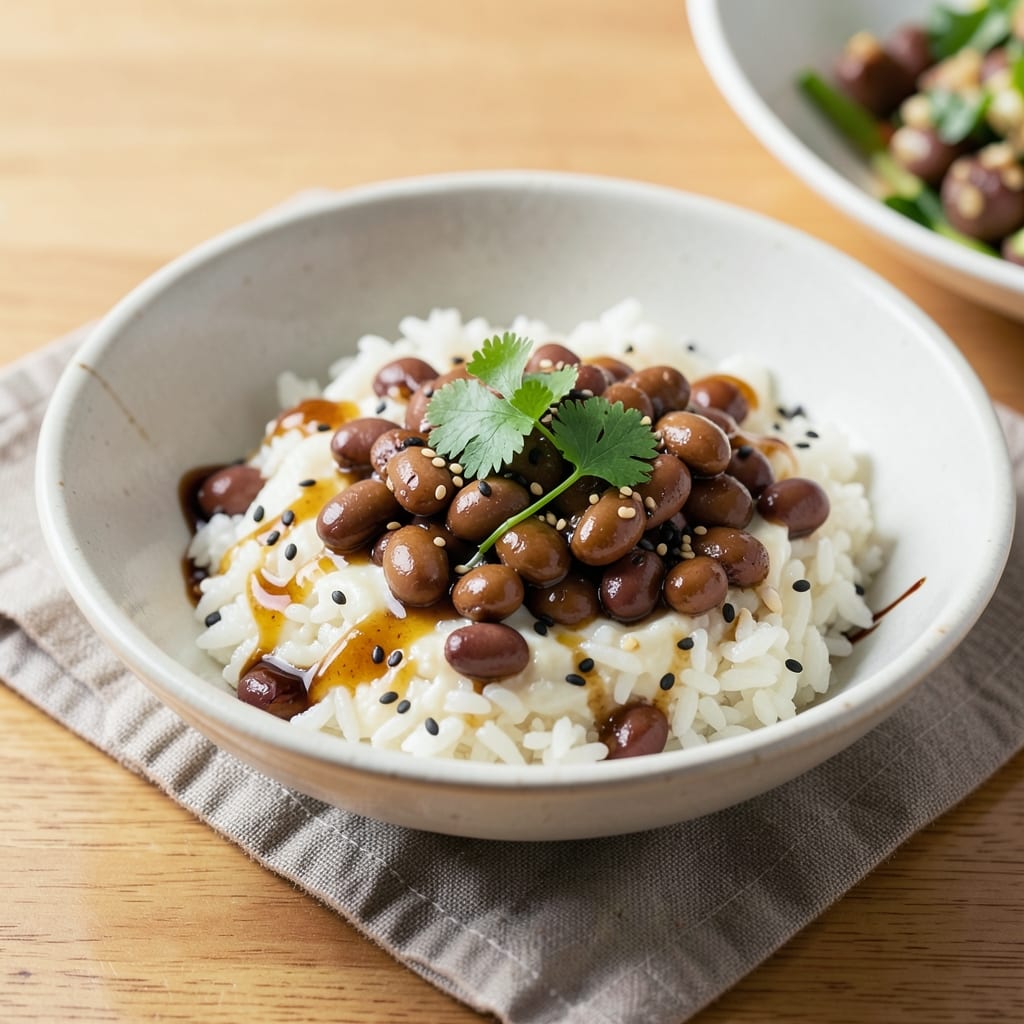
This one-pot adzuki beans and rice recipe transforms simple ingredients into a deeply satisfying dish that bridges sweet and savory flavors. The secret lies in simmering adzuki beans with rice until they develop a tender, almost custard-like texture while absorbing the surrounding aromatics. I first discovered this technique while exploring Japanese home cooking traditions, where red bean rice serves as both dessert and main dish—its versatility never fails to impress.
The beauty of this recipe is its adaptability—whether you prefer a lightly sweetened version with a touch of sugar and soy sauce or a more savory take with miso and sesame oil. The one-pot method ensures minimal cleanup while delivering restaurant-quality results. Cooking time is generous (about 45 minutes), but the process is hands-off, making it perfect for weeknight dinners or meal prep.
By the time it's ready, you'll have a dish with creamy adzuki beans that melt into the rice, creating a texture that's both comforting and elegant. The aroma alone—warm, nutty, and slightly sweet—will have everyone at the table anticipating the first bite. This is the kind of meal that feels special without requiring special effort.
Serve it as a standalone dish with pickled vegetables for contrast or alongside grilled fish for a complete meal. The leftovers reheat beautifully, making it an ideal solution for busy households. Let's create this harmonious one-pot masterpiece.
Ingredients for adzuki beans and rice
Japanese-inspired harmony in one pot—where tender adzuki beans and aromatic rice unite.
| Ingredient | Amount | Notes |
|---|---|---|
| Short-Grain White Rice 🍚 | 1 cup | Uncooked, preferably Japanese short-grain |
| Dried Adzuki Beans 🌱 | 1 cup | Rinsed thoroughly before use |
| Water 💧 | 3 cups | Filtered preferred for best flavor |
| White Miso Paste 🧈 | 2 tbsp | High-quality, non-GMO preferred |
| Soy Sauce 🍶 | 2 tbsp | Organic tamari for gluten-free option |
| Sesame Oil 🫒 | 1 tbsp | Toasted sesame oil for aroma |
| Fresh Ginger 🧄 | 1 tbsp | Finely grated, organic preferred |
| Granulated Sugar 🍚 | 2 tbsp | Adjust to taste for sweetness |
| Dried Shitake Mushrooms 🍄 | 2 pieces | Rehydrated and sliced |
| White Sesame Seeds 🌾 | 1 tbsp | Toasted for garnish |
| Rice Vinegar 🍶 | 1 tbsp | For subtle acidity balance |
| Sea Salt 🧂 | ½ tsp | Diamond Crystal preferred |
| Vegetable Oil 🫒 | 1 tbsp | For initial sautéing |
The adzuki beans are the heart of this dish, so quality matters. Look for small, uniformly shaped beans at specialty Asian markets—they're worth the hunt. Marukyu brand is my go-to for consistent texture. If using dried beans, soak them overnight for even cooking, but the recipe works with canned adzuki too (just drain well). The short-grain rice should be Japanese-style like Koshihikari—it absorbs liquid beautifully without becoming mushy. For the miso, White Pearl by Hodo delivers the cleanest flavor profile, but any high-quality white miso will work.
Short on sesame oil? Toast whole sesame seeds in a dry pan until golden, then grind them with a pinch of salt for a DIY alternative. No fresh ginger? Ground ginger at half the amount works in a pinch, though it lacks the bright zing. The shiitake mushrooms add umami depth—if you can't find dried, fresh shiitake at one-third the quantity is perfect. For a sweeter profile, maple syrup or agave can replace sugar, though the texture will be slightly less traditional. The soy sauce can be swapped for coconut aminos for a gluten-free option.
This dish tastes even better the next day as flavors meld. Store in an airtight container for up to 5 days in the fridge, though I recommend making a double batch—it disappears quickly. For freezing, portion into individual containers for 3 months of meal-prep convenience. Reheat gently with a splash of water to restore creaminess. The sesame seeds toast beautifully when reheated, so sprinkle fresh ones on top when serving for that restaurant-quality finish.
Why You'll Love This Recipe
- No-Soaking Needed: I’ll admit, I used to dread the whole soaking thing—until I realized you can just toss in dried adzuki beans with the rice and water. They soften right alongside, and honestly? The texture comes out just tender enough, with that perfect bite. Two fewer steps, same cozy result.
- Umami Bomb: That white miso paste and soy sauce combo? It’s the secret weapon here. The beans soak up the savory depth like a sponge, while the rice gets this subtle, sticky richness that sticks with you. Not too sweet, not too salty—just ridiculously balanced.
- Lunchbox Hero: Between us, this is my go-to for packed lunches. Cool it down, and the flavors only get better. My kids (and my husband, who won’t admit he’s a fan) devour it cold or reheated. The beans hold their shape, the rice stays fluffy—no sad, mushy leftovers here.
- Pantry Staple Power: Five ingredients, zero specialty shopping. Adzuki beans last forever, rice is cheap, and miso? That jar’s good for everything. I’ve made this on a $5 grocery run, and it still tastes like I slaved over it. Plus, it reheats like a dream—my lazy-Sunday-morning breakfast hack.
Step-by-step instructions for adzuki beans and rice harmony
This one-pot method delivers perfectly balanced sweet-savory flavors with minimal effort.
Prepare the Adzuki Beans and Shitake Mushrooms
Begin by rinsing the 1 cup dried adzuki beans under cold water until the water runs clear. This removes any surface impurities and prevents bitterness during cooking. Place the beans in a medium saucepan and cover with 3 cups water. Bring to a gentle boil over medium-high heat, then immediately reduce to low heat and simmer for 45 minutes until the beans are tender but still hold their shape.
While the beans simmer, prepare the 2 pieces dried shitake mushrooms by placing them in a small bowl and covering with hot water. Let them soak for 15 minutes until fully rehydrated. Drain and slice them into thin strips—this texture will add delightful umami depth to your dish. Keep both components warm until ready to combine.
Sauté Aromatics and Build the Flavor Base
Heat the 1 tablespoon vegetable oil in a heavy-bottomed pot over medium heat. Add the 1 tablespoon finely grated fresh ginger and sauté for 30 seconds until fragrant—you should smell the bright, citrusy aroma of ginger. Immediately add the sliced shitake mushrooms and cook for 2 minutes until their moisture evaporates and they develop a golden sheen.
Push the mushrooms to one side of the pot and add the 1 cup short-grain white rice to the empty space. Toast the rice for 1 minute until it becomes translucent at the edges—this step enhances the nutty flavor of the rice. Stir everything together and cook for another 30 seconds to distribute the aromatics evenly.
Combine All Ingredients for Even Cooking
Pour the simmered adzuki beans (with their cooking liquid) into the pot with the rice and mushrooms. Stir gently to combine, then add the 2 tablespoons white miso paste, 2 tablespoons soy sauce, 2 tablespoons granulated sugar, and 0.5 teaspoon sea salt. The miso will dissolve slowly, creating a rich, fermented flavor that ties everything together.
Bring the mixture to a gentle simmer over medium-low heat. Cover the pot with a tight-fitting lid and cook for 15 minutes without stirring. This undisturbed cooking allows the rice to absorb moisture evenly and develop its signature sticky texture. You'll know it's ready when the liquid is mostly absorbed and the rice is tender with a slight bite.
Finish with Sesame Oil and Vinegar
Once the rice is cooked, remove the pot from heat and stir in the 1 tablespoon toasted sesame oil and 1 tablespoon rice vinegar. The sesame oil adds a nutty aroma and subtle heat, while the vinegar brightens the dish with its delicate acidity. Taste and adjust seasoning—you may need a touch more soy sauce for saltiness or sugar for sweetness, depending on your preference.
Let the dish rest for 5 minutes covered to allow the flavors to meld. Before serving, sprinkle each portion with 1 tablespoon white sesame seeds for added crunch and visual appeal. This one-pot harmony delivers a perfect balance of sweet, savory, and umami in every bite, with the adzuki beans adding satisfying texture contrast to the tender rice.
Pro Tips For Making Adzuki Beans And Rice
- SOAK BEANS 8 HOURS (or overnight): I learned this the hard way—skipping the soak leaves adzuki beans tough and mealy. Even 4 hours isn’t enough; they need time to plump up fully. Use room-temperature water and a pinch of salt to keep them from absorbing too much before cooking.
- COOK RICE AND BEANS SEPARATELY: Mixing them together in one pot turns the rice gummy and the beans mushy. Cook the rice in a 1:1.2 rice-to-water ratio until just tender, then simmer the beans in their own broth until fork-tender. Combine only at the very end—this keeps textures perfect.
- STIR MISO PASTE IN LAST: Add the miso paste when the beans are almost done, not at the start. The heat breaks down its flavor too fast, making it taste bland. Mix it into the warm (not boiling) bean broth with a splash of soy sauce, then let it bloom for 2 minutes before combining everything.
- USE LESS SOY SAUCE: Start with half the amount called for—you can always add more. Soy sauce is salty, and adzuki beans already pack a punch. Taste the broth before mixing with rice; adjust only if needed. Overdoing it makes the dish taste flat, not savory.
Serving suggestions for adzuki beans and rice
Traditional Pairings
Serve this adzuki bean rice alongside steamed gyoza or miso soup for an authentic Japanese-inspired meal. The umami depth of the miso soup complements the dish's sweet-savory balance beautifully. I love pairing it with quick-pickled cucumbers—just thinly slice ½ cucumber, toss with 1 tbsp rice vinegar, ½ tsp sugar, and ¼ tsp salt—for a refreshing contrast. 🥒
Protein Additions
For a complete meal, top individual portions with grilled tofu or pan-seared tempeh for plant-based protein. I recommend pressing ½ block extra-firm tofu for 15 minutes, then pan-frying in 1 tbsp sesame oil until golden. Alternatively, add soft-boiled eggs for a classic Japanese breakfast-style presentation. The egg whites add a silky texture that contrasts perfectly with the creamy beans and rice.
Modern Toppings
Elevate your dish with modern toppings like avocado slices, crispy fried shallots, or quick-pickled red onions. For the shallots, thinly slice 2 shallots, fry in 2 tbsp vegetable oil until golden, then drain on paper towels. The crispy texture adds an exciting crunch. A drizzle of spicy mayo—mix 2 tbsp vegan mayo with ½ tsp sriracha—adds a tangy kick that cuts through the richness. 🌶️
Beverage Pairings
Pair this dish with a green tea latte or jasmine tea to cleanse the palate between bites. For something more robust, try a light-bodied sake like Hakkaisan Junmai—its subtle sweetness enhances the adzuki's natural flavors. If you prefer beer, a crisp Japanese lager like Asahi Super Dry provides a refreshing contrast without overpowering the dish. Avoid heavy, hoppy beers that could clash with the delicate flavors.
Garnish Finishing Touches
Before serving, add a final touch with microgreens or thinly sliced scallions for freshness. I also love a sprinkle of flaky sea salt—like Maldon—to enhance the umami notes. For a smoky element, add a pinch of smoked paprika or a few drops of liquid smoke (just ¼ tsp) to the finished dish. These small details elevate the presentation and add layers of flavor that make the dish feel restaurant-quality.
Nutrition facts
Frequently asked questions
Can I use canned adzuki beans instead of dried?
Yes! Canned adzuki beans work perfectly—just drain and rinse them well to remove excess sodium. For the best texture, simmer them for 5-10 minutes after adding to the rice to soften further. You may need to add 1-2 tablespoons extra water since canned beans release less liquid than dried.
How do I adjust the sweetness level?
Start with the 2 tablespoons sugar as written, then taste before serving. For a sweeter version, add 1 extra tablespoon at the end. For less sweetness, reduce to 1 tablespoon sugar or omit entirely—balance with more soy sauce or miso. The beans' natural sweetness develops during cooking.
Why is my rice still crunchy after cooking?
This usually happens if the heat wasn't low enough or the pot wasn't tightly covered. After combining ingredients, ensure the heat is medium-low and the lid fits snugly. If using a heavy pot, reduce to low heat for the final 10 minutes to prevent steam from escaping.
Can I make this dish in an Instant Pot?
Sauté the ginger and mushrooms as directed, then add all ingredients (including beans and rice) to your Instant Pot. Cook on high pressure for 8 minutes, then let it naturally release for 10 minutes. Stir in sesame oil and vinegar at the end. The texture will be slightly firmer, so fluff with a fork before serving.
What's the best way to store leftovers?
Transfer to an airtight container and refrigerate for up to 5 days. Reheat gently with 1-2 tablespoons water in a covered pot over low heat to restore creaminess. For freezing, portion into individual containers and store for 3 months. The flavors actually improve overnight!