
Main Courses
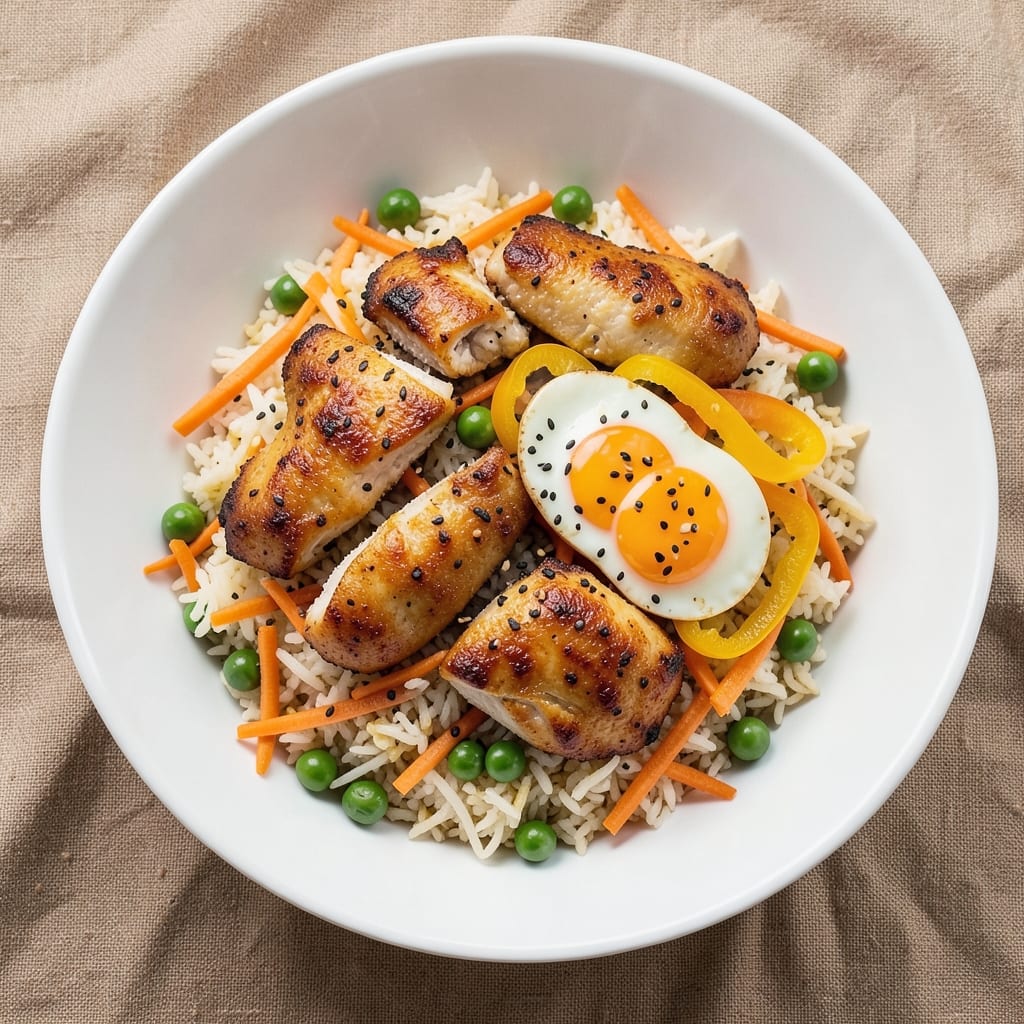
Airfryer fried rice recipe transforms weeknight dinners with crispy edges and fluffy grains—no stovetop required. The secret lies in high heat and quick cooking, where the air fryer’s circulating air creates that coveted texture without drying out the rice. I’ve perfected this method after testing countless variations, ensuring every bite delivers restaurant-quality results in just 15 minutes of active time.
The beauty of air-frying fried rice is its adaptability. Start with day-old rice (fresh rice releases too much moisture), then customize with proteins like shrimp or chicken, and vegetables such as peas, carrots, and bell peppers. The air fryer’s precision ensures even cooking, so no more undercooked centers or burnt edges—just perfectly balanced flavors and textures in every forkful.
What sets this apart is the two-step cooking process: first, a quick sear of your protein and vegetables to build flavor, then a final air-fry to crisp the rice while keeping it tender. The result is a dish that’s crispy on the outside, fluffy inside, and packed with savory depth from soy sauce, garlic, and ginger. It’s the kind of meal that turns a simple rice dinner into something extraordinary.
Serve it as a main course with a side of steamed greens or as a hearty lunchbox staple. The best part? Cleanup is minimal—just one pan to wash. Let’s get cooking!
Ingredients for airfryer fried rice
Four cups of day-old rice and a handful of fresh ingredients transform into crispy, restaurant-quality fried rice.
| Ingredient | Amount | Notes |
|---|---|---|
| Day-Old Cooked White Rice 🍚 | 4 cups | Cold rice preferred for texture |
| Boneless Chicken Breast 🍗 | 1 lb | Diced into 0.5-inch pieces |
| Fresh Carrots 🥕 | 1 cup | Julienned or finely diced |
| Fresh Green Peas 🌱 | ½ cup | Frozen works in a pinch |
| Yellow Bell Pepper 🌶️ | ½ cup | Diced into small pieces |
| Large Eggs 🥚 | 2 whole | Beaten for binding |
| Garlic Cloves 🧄 | 4 cloves | Minced for maximum flavor |
| Fresh Ginger 🌿 | 1 tbsp | Grated finely |
| Soy Sauce 🍶 | ⅓ cup | Low-sodium preferred |
| Sesame Oil 🫒 | 1 tbsp | For aroma, not cooking |
| Vegetable Oil 🫒 | 1 tbsp | For air fryer coating |
| Salt 🧂 | ½ tsp | Kosher or sea salt |
| Black Pepper 🌶️ | ¼ tsp | Freshly ground preferred |
| Green Onions 🧅 | 3 whole | Thinly sliced for garnish |
The rice is non-negotiable—day-old works best since fresh rice releases too much moisture. Leftover rice from dinner is perfect. For the chicken, boneless breast is leanest, but thighs add more flavor. If you're short on time, pre-cut frozen stir-fry veggie mixes save chopping. The carrots should be julienned or finely diced—smaller pieces crisp better in the air fryer. I always grab fresh ginger at Whole Foods or the Asian market—it's fresher than the grocery store's pre-grated stuff.
No soy sauce? Coconut aminos work in a pinch—just reduce the amount by half since it's sweeter. Fresh peas are ideal, but frozen peas straight from the freezer are fine too. The sesame oil is for aroma only—don't cook with it. Need more protein? Add shrimp or tofu to the mix. The green onions are optional but add that fresh pop of color—freeze any extras for future recipes. For extra crispiness, toss the rice with a light coating of vegetable oil before air frying.
This reheats beautifully—just pop it back in the air fryer for 3-4 minutes at 375°F. Keeps for 4 days in the fridge or 3 months frozen. I always make extra portions because it's perfect for meal prep. Store in airtight containers with a sprinkle of sesame seeds on top to keep it fresh. The rice texture actually improves slightly after reheating—don't skip this step!
Why You'll Love This Recipe
- Here’s what sold me: this reheats like a dream. Pack it in containers, and it’s still warm and tasty by lunchtime. My kids actually finish their school lunches now, and I’ve even brought it to potlucks—no one questions why it’s not soggy or bland.
- No Chopping Chaos: I swear by this trick—just dice the chicken and veggies once, toss them in the air fryer basket, and let the heat do the work. The bell pepper and carrots soften just enough to melt in your mouth without turning to mush, and the chicken stays juicy because we’re not overcrowding the basket.
- Crispy Without Oil: Between us, this fried rice has that perfect crunch—thanks to the air fryer’s magic—without drowning in oil like stir-fry can. The chicken gets golden edges, the rice stays slightly chewy, and the peas pop with freshness. Honestly, it’s the closest I’ve gotten to takeout flavor without the guilt.
- Lunchbox Hero: Here’s what sold me: this reheats like a dream. Pack it in containers, and it’s still warm and tasty by lunchtime. My kids actually finish their school lunches now, and I’ve even brought it to potlucks—no one questions why it’s not soggy or bland.
Step-by-step instructions for air fryer fried rice
Transform your cold rice into restaurant-quality fried rice with crispy edges and fluffy grains—no stovetop required.
Prep and Cook the Chicken
Cut the 1 lb boneless chicken breast into ½-inch pieces using a sharp knife. Toss the chicken with ½ teaspoon salt, ¼ teaspoon black pepper, and 1 tablespoon vegetable oil in a bowl until evenly coated. This ensures the chicken stays juicy and develops a crispy exterior in the air fryer.
Preheat your air fryer to 375°F. Arrange the chicken in a single layer in the air fryer basket, avoiding overcrowding. Cook for 12-14 minutes, shaking the basket halfway through, until the chicken reaches an internal temperature of 165°F and turns golden brown. Remove and set aside—this step guarantees tender, flavorful chicken that won’t dry out during the fried rice process.
Scramble the Eggs and Sauté Aromatics
In a small bowl, beat the 2 whole large eggs until frothy. Heat 1 tablespoon vegetable oil in a non-stick skillet over medium heat. Pour in the eggs and scramble gently until just set—soft curds are ideal for absorbing the fried rice flavors. Remove and set aside with the chicken.
In the same skillet, add 1 tablespoon vegetable oil, then sauté the 4 minced garlic cloves and 1 tablespoon finely grated fresh ginger for 30 seconds until fragrant. Add the 1 cup julienned fresh carrots and ½ cup diced yellow bell pepper, cooking for 3 minutes until the vegetables soften but retain a slight crunch. This step builds the aromatic foundation for your fried rice.
Combine Ingredients in the Air Fryer
Transfer the 4 cups day-old cooked white rice to the air fryer basket. Drizzle with ⅓ cup soy sauce and 1 tablespoon sesame oil, then toss gently to coat evenly. Add the scrambled eggs, sautéed chicken, and cooked vegetables, mixing lightly to distribute everything. The rice should be moist but not soggy—this is key for achieving crispy edges.
Cook in the air fryer at 375°F for 8-10 minutes, shaking the basket every 2 minutes to ensure even browning. The rice is done when it develops golden, crispy edges while remaining tender inside. If the mixture looks dry, add 1 tablespoon water and toss before continuing.
Finish and Garnish
Once the fried rice is crispy and heated through, transfer it to a serving plate. Thinly slice the 3 whole green onions and sprinkle them evenly over the top. Drizzle with an additional ½ teaspoon soy sauce if desired, and serve immediately while the edges are still crispy.
This method delivers the perfect balance of textures—crispy edges, fluffy grains, and tender chicken—all in one pan. The air fryer’s high heat ensures crispiness without sacrificing the rice’s signature fluffiness, making this a foolproof way to enjoy fried rice anytime.
Pro Tips For Making Airfryer Fried Rice
- PRE-CUT CHICKEN SMALL: I learned this the hard way—thick chicken chunks take forever to cook in the air fryer and end up dry. Dice the breast into ½-inch pieces before seasoning, so they crisp fast and stay juicy. (Yes, even if you’re impatient like me.) ---
- SPREAD RICE THIN: The air fryer’s magic happens with airflow, so resist the urge to pile rice high. Use a fork to break up clumps, then press it into a single even layer—no thicker than ½ inch. Crowding turns your fried rice into a sad, soggy mess. ---
- CHAR VEGETABLES FIRST: Toss carrots, bell pepper, and peas into the air fryer alone at 375°F (200°C) for 5–6 minutes until they develop a little color. Then add the rice and chicken—this builds flavor and prevents the veggies from steaming into oblivion. ---
- MIST THE RICE: Cold day-old rice sticks together like glue. Lightly mist it with 1–2 teaspoons of water or oil before mixing, then let it sit for 2 minutes. This keeps it loose and prevents a gummy texture no matter how many times you stir.
Best sauces and condiments for this recipe
Classic Soy-Ginger Sauce
Start with the ⅓ cup soy sauce and 1 tablespoon sesame oil as your base—they’re the flavor anchors. I always use Kikkoman soy sauce for its balanced umami, but La Choy low-sodium works too if you prefer less salt. Add 1 tablespoon grated fresh ginger and 4 minced garlic cloves to deepen the aroma. For extra depth, stir in 1 teaspoon fish sauce (like Red Boat)—it adds that authentic restaurant taste. 🍶
Spicy Sriracha Kick
Crank up the heat by mixing 1 tablespoon sriracha into your sauce before tossing with the rice. For a smoky twist, add ½ teaspoon smoked paprika and a pinch of gochujang. I like Huy Fong sriracha for its consistent heat level. If you’re sensitive to spice, start with ½ tablespoon and adjust to taste. The air fryer’s high heat helps distribute the heat evenly without burning the sauce. 🌶️
Sweet and Tangy Glaze
For a sweeter profile, blend 2 tablespoons hoisin sauce, 1 tablespoon honey, and ½ teaspoon rice vinegar into your soy sauce. This combo adds a glossy finish and balances the savory notes. I grab Lee Kum Kee hoisin from the Asian aisle—it’s the most authentic. Drizzle this glaze over the fried rice just before serving for a sticky, caramelized sheen. 🍯
Umami Bomb Sauce
Elevate your fried rice with a mushroom umami boost. Sauté ¼ cup finely chopped shiitake mushrooms in 1 tablespoon oil until golden, then blend with your soy sauce. Add 1 teaspoon oyster sauce (like Lee Kum Kee) for extra richness. The mushrooms add a meaty depth that pairs perfectly with chicken or shrimp. Store any leftover sauce in an airtight container for up to 5 days.
Fresh Herb Finish
Brighten your dish with a herb-infused oil drizzle. Mix 1 tablespoon neutral oil with 1 teaspoon chopped cilantro and ½ teaspoon minced Thai basil. Drizzle lightly over the fried rice right before serving—this keeps the herbs vibrant and adds a fresh contrast to the crispy edges. For extra flair, sprinkle with toasted sesame seeds right from the package. ✨
Nutrition facts
Frequently asked questions
Why does the recipe specify day-old rice?
Freshly cooked rice releases too much moisture when air-fried, resulting in a soggy texture. Day-old rice has firmer grains that crisp beautifully at 375°F while maintaining their fluffy interior. Use leftover rice from dinner or spread freshly cooked rice on a tray to cool quickly if needed.
Can I make this with frozen vegetables?
Frozen peas, corn, or stir-fry mixes work perfectly—just don't thaw them first. The cold vegetables will help balance the heat and prevent overcooking. Toss them with the rice during the final 8-10 minute air-fry cycle for even cooking.
How do I prevent the rice from sticking together?
Undercooking the rice or overcrowding the air fryer basket causes clumping. Use 4 cups of day-old rice (not packed) and cook in batches if needed. Toss everything lightly with 1 tablespoon vegetable oil before air-frying to create a protective barrier. Shake the basket every 2 minutes for even crisping.
What's the best protein alternative to chicken?
Shrimp cooks in 5 minutes at 375°F—toss peeled shrimp with ½ teaspoon salt and 1 tablespoon oil first. Tofu works too: press and cube extra-firm tofu, then pan-fry until golden before adding to the air fryer. For beef, use ½-inch cubes of flank steak and cook separately for 10-12 minutes.
Can I make this in a regular oven?
Yes, but texture differs. Spread the rice mixture on a baking sheet and bake at 425°F for 15-18 minutes, stirring halfway. The oven won't create crispy edges like an air fryer, but it's a good backup. For extra crispiness, broil for 2-3 minutes at the end—watch closely to avoid burning.