
Main Courses
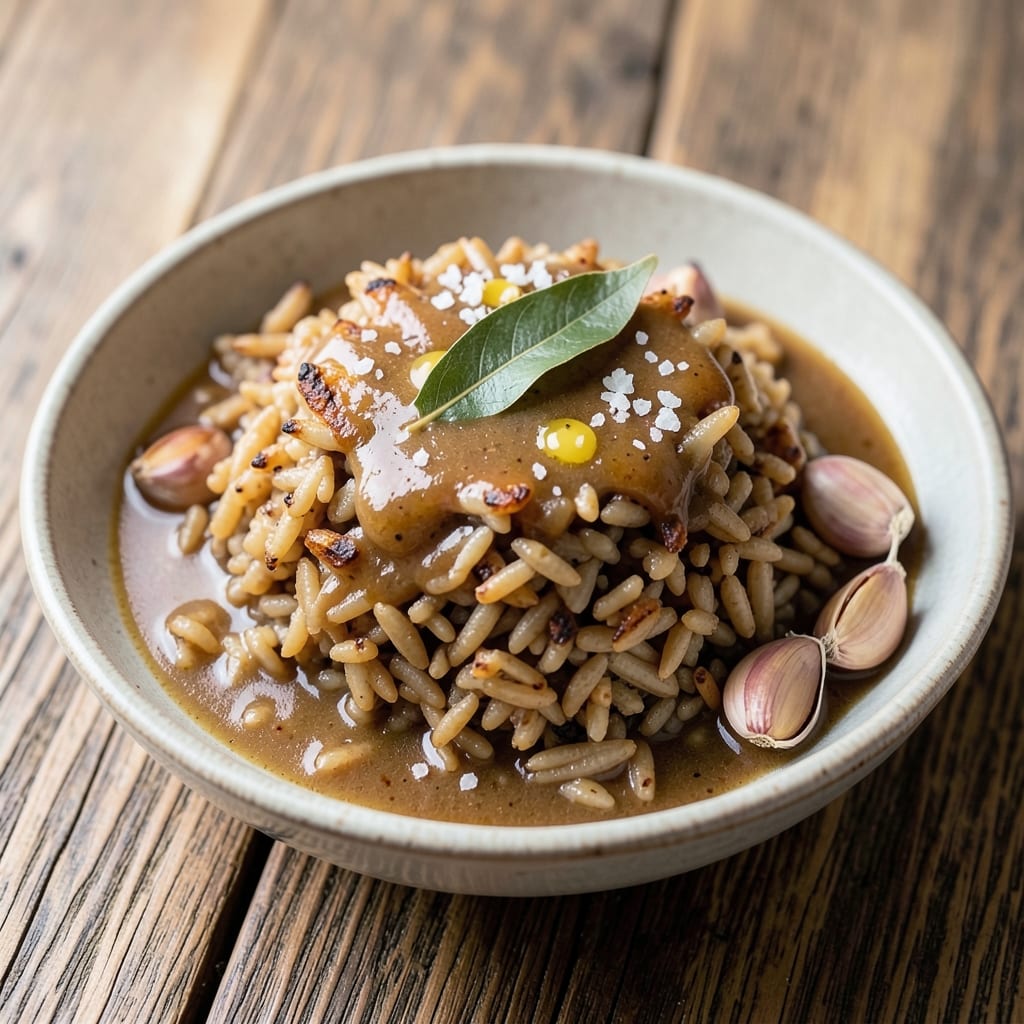
This amazing brown rice recipe transforms simple grains into nutty, aromatic perfection that steals the show at every meal. 💛 The secret? Toasting the rice before cooking unlocks deep, toasty flavors that store-bought versions can't match—think warm cinnamon and caramelized edges in every bite. I perfected this method after years of bland brown rice failures, and trust me, your taste buds will notice the difference immediately.
What makes this recipe special is how it balances simplicity with restaurant-quality results. You'll rinse the rice thoroughly (critical for fluffy texture), then toast it in butter until golden—this step alone creates that signature nutty aroma. Cooking in broth instead of water infuses the grains with extra flavor, while a final rest under a towel keeps them tender and separate. It's the kind of side that turns basic meals into something extraordinary.
By the time you're done, you'll have perfectly cooked brown rice with a satisfying chew and toasted aroma that fills your kitchen. The grains stay distinct and flavorful, making it ideal for bowls, stir-fries, or as a hearty side. This isn't just brown rice—it's a flavor-packed centerpiece that proves healthy eating can be delicious.
Bonus: The same method works for wild rice blends or quinoa, so you can easily swap ingredients based on what you have. Let's get cooking—your next meal is about to get an upgrade!
Ingredients for amazing brown rice
Toasted butter, nutty rice, and fragrant broth—this is how you make ordinary brown rice extraordinary.
| Ingredient | Amount | Notes |
|---|---|---|
| Long-Grain Brown Rice 🌾 | 1 cup | Uncooked, rinsed thoroughly |
| Unsalted Butter 🧈 | 2 tbsp | Cold, cut into small cubes |
| Chicken Broth 💧 | 2 cups | Low-sodium preferred |
| Garlic Cloves 🧄 | 2 cloves | Minced, for aroma |
| Bay Leaves 🌿 | 2 whole | Fresh or dried |
| Salt 🧂 | ½ tsp | Kosher or sea salt |
| Black Peppercorns 🌶️ | ¼ tsp | Freshly cracked |
| Fresh Parsley 🌿 | ¼ cup | Chopped, for garnish |
| Lemon Zest 🍋 | 1 tsp | From 1 small lemon |
| Toasted Almond Slices 🥜 | ¼ cup | For garnish, optional |
The rice is non-negotiable here—Bob's Red Mill or Lundberg are my go-tos for consistent texture. If you're buying in bulk, check the package date—older rice loses its toasty potential. The butter needs to be cold and cubed for even browning, and trust me, don't skip the toasting step. That's where the magic happens. For the broth, low-sodium options keep the flavors balanced, but homemade is even better. I keep a batch in my freezer for quick meals.
No chicken broth? Vegetable broth works perfectly, just add a pinch of salt to compensate. Fresh bay leaves add depth, but dried at half the amount is fine in a pinch. The parsley is purely for garnish—skip it if you're short on time. For extra richness, stir in 1 tbsp of toasted sesame oil at the end. And if you're feeling fancy, swap the almonds for toasted pecans or cashews. The lemon zest brightens everything up—don't skip this part if you want that restaurant-quality finish.
This rice reheats beautifully—just add a splash of water and cover for 5 minutes. Keeps 4-5 days in the fridge, but honestly, it's gone before then. For meal prep, portion into containers with your favorite protein and veggies. Freezes for 3 months if you're planning ahead. Pro tip: Store the toasted butter cubes separately in the freezer—they'll keep for 6 months and make quick toasted rice whenever you need it.
Why You'll Love This Recipe
- I’ll be real: most brown rice leftovers taste sad. Not this one. The broth keeps it moist, the butter adds richness, and the garlic flavor only deepens overnight. Reheat it, and it’s like you’re eating it fresh—no dry, stale rice here. Plus, it’s cheap enough to make double batches without stressing.
- Five-Ingredient Magic: I swear, this is the kind of recipe where you almost feel guilty for how little effort it takes. Brown rice, butter, broth, garlic, and bay leaves—that’s it. No fancy steps, no hidden tricks, just simmering until the grains are tender and the aromas fill your kitchen like a warm hug.
- Buttery Garlic Kiss: That first bite where the nutty brown rice meets the rich, melted butter and fragrant garlic? Honestly, it’s the kind of flavor that makes you pause mid-chew. The bay leaves add this subtle earthiness that elevates it from "side dish" to "main event" without trying too hard.
- Weeknight Workhorse: Between us, this is my go-to when I need something reliable for meal prep or a quick weeknight dinner. Toss it with roasted veggies, use it as a base for stir-fries, or serve it under a simple protein—it’s the blank canvas I always reach for, and it never lets me down.
Step-by-step instructions for nutty brown rice perfection
Here's how to transform simple brown rice into restaurant-quality side dish magic.
🍳 Step 1: Toast the Butter and Aromatics
Heat a medium saucepan over medium heat and add the 2 tbsp unsalted butter cut into small cubes. Let it melt completely, then add the 2 cloves minced garlic and 2 whole bay leaves. Cook for 1-2 minutes until the butter foams and the garlic becomes fragrant—not browned, just aromatic.
This toasting step builds incredible flavor. You'll know it's ready when the butter stops bubbling vigorously and the garlic releases its sweet, nutty aroma. Real talk: skipping this makes all the difference between good and amazing brown rice.
👨🍳 Step 2: Add Rice and Toast for Depth
Add the 1 cup long-grain brown rice to the pan and stir to coat it evenly with the buttery garlic mixture. Toast the rice for 1-2 minutes, stirring constantly, until it becomes translucent at the edges and smells distinctly nutty. This step enhances the rice's natural flavor and prevents a bland result.
Don't walk away—you want the rice to develop color but not burn. When it releases that toasty aroma, you're ready for the next step. I always press down gently with a wooden spoon to ensure even contact with the pan.
🍲 Step 3: Cook with Broth and Seasonings
Pour in the 2 cups chicken broth and add the 0.5 tsp salt and 0.25 tsp cracked black peppercorns. Bring to a gentle boil, then immediately reduce heat to low. Cover with a tight-fitting lid and simmer for 35-40 minutes—this is where the magic happens.
Here's the thing—brown rice needs patience. You'll see steam rising steadily from the sides of the lid. If it gets too vigorous, lower the heat slightly. The rice is done when it's tender but still has a slight bite, and all the liquid has been absorbed.
⏰ Step 4: Rest and Finish with Bright Flavors
Remove from heat and let the rice rest for 5 minutes covered. This resting period allows the rice to finish cooking evenly and absorb any remaining moisture. Then stir in the 1 tsp lemon zest and 0.25 cup chopped fresh parsley for a bright, fresh finish.
For that final touch, sprinkle with 0.25 cup toasted almond slices just before serving. The contrast of nutty rice with crunchy almonds and citrusy lemon zest makes this dish truly special. The lemon zest should brighten the nutty flavors while the almonds add texture.
Pro Tips For Making Amazing Brown Rice
- Rinse Until Clear: Brown rice clings to dirt and starch like it’s auditioning for a sticky situation. Swirl it in a fine-mesh strainer under cold water for 30 seconds—until the water runs nearly clear. This removes surface gunk that makes your rice gummy later, and you’ll notice the texture stays firm and separate instead of turning into a paste.
- Toast the Garlic Low: I used to blast the garlic in butter until it smelled like a campfire. Instead, cook it over medium-low heat until it’s golden but not brown—about 4-5 minutes. High heat burns garlic fast, and you’ll taste bitter smoke instead of sweet, nutty flavor. The butter should bubble gently, not scream.
- Simmer, Don’t Boil: Once the rice hits the broth, reduce heat to a bare simmer—just enough to see tiny bubbles at the edges. Boiling hard turns brown rice mushy and releases too much starch, making it gluey. A steady simmer keeps the grains intact and lets the broth work its magic without overpowering the texture.
- Butter in Stages: Don’t dump all the butter in at once—add half when the rice starts cooking, then the rest in the last 5 minutes. This prevents the butter from separating or burning while the rice simmers. The final swirl of melted butter at the end coats every grain, making it taste rich without overpowering the broth’s depth.
Pro cooking tips for this recipe
Toast Before Cooking
This is the secret weapon in my nutty brown rice recipe—toasting the rice before adding liquid unlocks deep, caramelized flavors that store-bought versions miss. Heat your rice in a dry pan over medium heat for 2-3 minutes, stirring constantly, until it turns a golden brown and smells like toasted nuts. This step develops the Maillard reaction, creating that irresistible aroma and texture. I use a heavy-bottomed stainless steel pan for even heat distribution—cast iron works too, but watch it closely to avoid burning. 🔥
Broth Over Water
Skip the plain water and use chicken or vegetable broth instead—it adds layers of flavor without extra salt. I prefer low-sodium broth (like Pacific Foods or Imagine) to control seasoning, but homemade is even better. For extra depth, add 1 tsp soy sauce or 1 bay leaf while cooking. The broth should just cover the rice—about 2 cups for 1 cup dry rice. If using a pressure cooker, reduce liquid to 1.5 cups and cook for 20 minutes on high pressure.
Perfect Resting Time
Never skip the 5-10 minute rest after cooking! This lets steam redistribute, ensuring every grain is tender and flavorful. I cover the pot with a clean kitchen towel before sealing with the lid to trap moisture. For meal prep, let it rest 10 minutes, then portion into glass airtight containers with a splash of water to keep it moist. Reheat gently on the stove with 1 tbsp broth to restore texture—microwaving dries it out.
Lemon Zest Brightness
The lemon zest at the end isn’t just for flavor—it cuts through the richness and adds a refreshing pop. Use a microplane for fine, fragrant strips (avoid the pith, which is bitter). I also add 1 tbsp fresh parsley for color and a pinch of red pepper flakes if you want heat. For a smoky twist, finish with ½ tsp smoked paprika. The zest should be added off-heat to preserve its brightness.
Garnish Like a Pro
Toasted nuts or seeds are the perfect finishing touch—almonds, pecans, or pumpkin seeds all work. I toast ¼ cup sliced almonds in a dry pan for 2 minutes until golden, then sprinkle over the rice. For a vegan option, use toasted sesame seeds or crushed pistachios. Garnish just before serving so the nuts stay crisp. Pro tip: Store extra toasted nuts in an airtight container for up to 2 weeks—they’ll keep for garnishing other dishes too.
Nutrition facts
Frequently asked questions
Why does this brown rice recipe taste so much better than regular brown rice?
The secret lies in toasting the rice and butter first, which creates deep, nutty flavors through the Maillard reaction. Using broth instead of water adds natural seasoning, while the lemon zest and fresh herbs at the end brighten everything up. It's these small techniques that transform ordinary rice into something extraordinary!
Can I use this method for other types of rice?
This technique works perfectly for wild rice blends or quinoa. Just adjust the cooking time—wild rice needs about 45-50 minutes while quinoa cooks in 12-15 minutes. The toasting and broth method enhances all grains beautifully. For short-grain brown rice, reduce the cooking time to 30-35 minutes.
What if my brown rice turns out mushy?
Mushy rice usually means either too much liquid or not enough resting time. For this recipe, always use 2 cups broth for 1 cup rice and never exceed 40 minutes of cooking time. After removing from heat, let it rest 5-10 minutes covered—this crucial step prevents mushiness. If it's still too soft, spread it on a baking sheet and dry it in the oven at 200°F for 10 minutes.
Can I make this ahead for meal prep?
Yes! This rice reheats beautifully for meal prep. Cook it as directed, then let it cool completely before storing in airtight containers with a splash of water (about 1 tbsp per cup of rice). It keeps for 4-5 days in the fridge. To reheat, warm gently on the stove with 1 tbsp broth or water—microwaving can make it dry. For freezing, portion into containers and store for up to 3 months.
What are some great ways to serve this brown rice?
This flavorful rice is perfect as a base for bowls (try with grilled chicken and roasted veggies), as a side for steak or fish, or even as a hearty main with beans and avocado. It also works wonderfully in stuffed peppers or rice pudding. The nutty flavor pairs especially well with spicy dishes or creamy sauces to balance the richness.