
Side Dishes
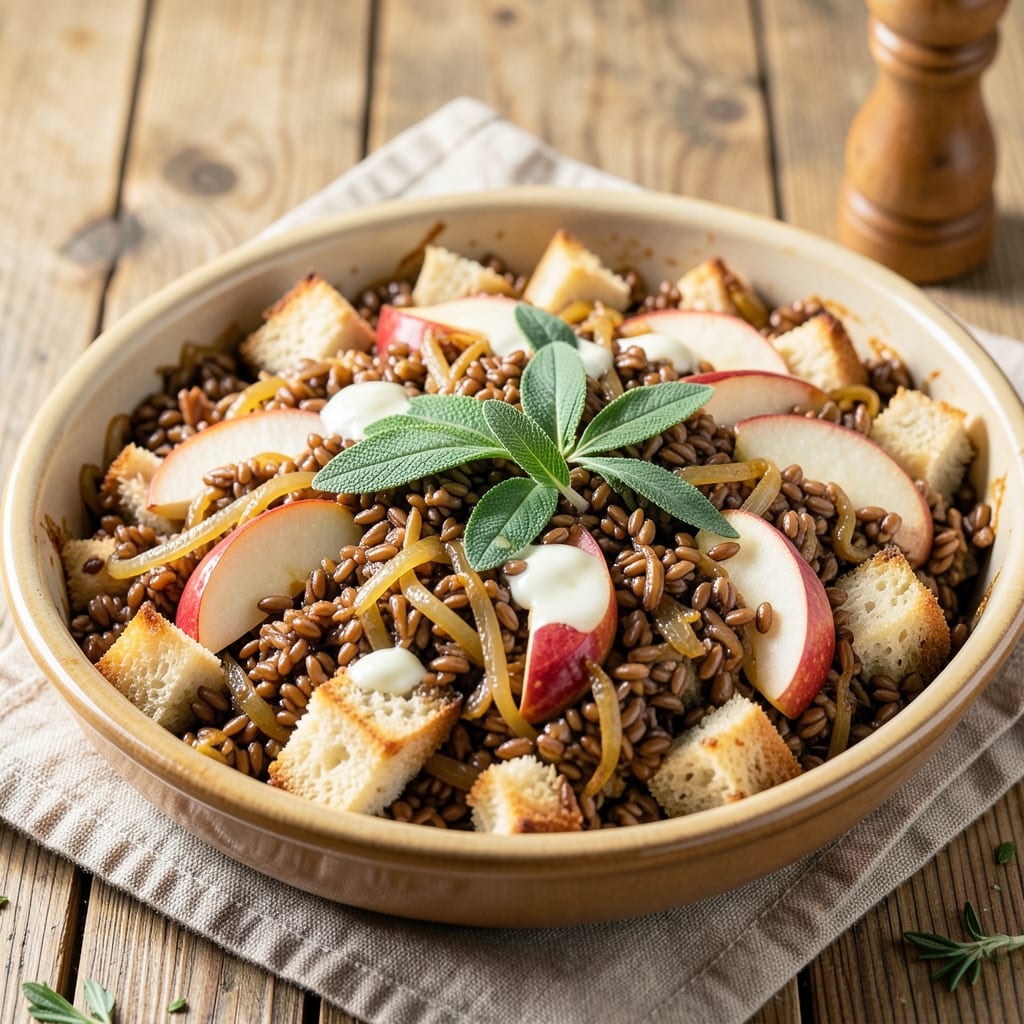
This apple and wild rice stuffing recipe transforms a classic holiday side into something extraordinary—crispy golden edges hugging tender, flavor-packed centers. The secret lies in balancing sweet apples, nutty wild rice, and perfectly toasted bread cubes, all tied together with aromatic herbs and a touch of cider. I developed this version after years of holiday stuffing frustrations, and it’s now my go-to for Thanksgiving tables that leave guests asking for seconds.
The magic happens in the baking: high heat creates that coveted crispy crust while keeping the interior moist and fragrant. Wild rice adds a satisfying chew, while tart apples and warm spices like cinnamon and sage elevate it beyond basic bread-and-butter stuffing. This recipe delivers restaurant-quality results without requiring advanced techniques—just careful layering and patience in the oven.
What you’ll end up with is a stuffing that’s crispy on the outside and moist in the heart, with pockets of caramelized apples and toasted bread that practically melt in your mouth. The aroma alone—warm spices mingling with fresh herbs—will have your kitchen smelling like a holiday feast before the oven even finishes. It pairs perfectly with roasted turkey, ham, or even as a vegetarian centerpiece.
For those with dietary needs, variations include gluten-free bread options and vegan butter substitutes, ensuring everyone at the table can enjoy this crowd-pleaser. Let’s get started—your holiday table deserves this showstopper.
Ingredients for apple and wild rice stuffing
Eight cups of bread cubes meet tart apples and nutty wild rice for this holiday showstopper.
| Ingredient | Amount | Notes |
|---|---|---|
| Day-Old Bread Cubes 🍞 | 8 cups | Sourdough or crusty bread preferred |
| Wild Rice Blend 🌾 | 1 ½ cups | Uncooked, toasted in butter |
| Granny Smith Apples 🍎 | 2 medium | Peeled, diced into 1/4-inch pieces |
| Unsalted Butter 🧈 | ¾ cup | Cold, cubed for toasting |
| Fresh Sage Leaves 🌿 | ½ cup | Chopped, stems removed |
| Yellow Onion 🧅 | 1 medium | Finely diced, about 1/2 cup |
| Celery Stalks 🥬 | 3 whole | Diced, about 1/2 cup |
| Apple Cider 🍏 | 1 cup | Unsweetened, for moisture |
| Chicken Broth 💧 | 1 ½ cups | Low-sodium, homemade preferred |
| Ground Cinnamon 🌶️ | 1 ½ tsp | Freshly toasted for depth |
| Ground Nutmeg 🌶️ | ½ tsp | Freshly grated preferred |
| Salt 🧂 | 1 ½ tsp | Diamond Crystal preferred |
| Black Pepper 🌶️ | 1 tsp | Freshly cracked |
| Fresh Thyme Leaves 🌿 | 1 tbsp | Chopped, stems removed |
The bread is non-negotiable—day-old sourdough or crusty French bread gives that perfect chewy texture. Costco or local bakeries usually have the best loaves, but any crusty bread works if you cube it yourself. Wild rice? Lundberg or Uncle Ben's blends are my go-tos—they toast beautifully. Apples should be tart, not sweet, so Granny Smiths are essential. If you can't find them, Honeycrisp is the next best thing. The onions and celery? Freshly diced makes all the difference—no pre-chopped sad bits here.
No wild rice? Brown rice or quinoa in a pinch, but toast it first. Subbing apples? Pears or dried cranberries add sweetness without the same texture. Fresh sage is ideal, but dried at one-third the amount works if you're in a bind. The broth can be vegetarian if needed—just use a good vegetable stock. For extra crispiness, toast the bread cubes in butter until golden before mixing everything. And trust me, toasting the wild rice in butter before cooking it deepens the flavor like crazy.
This stuffing reheats beautifully—450°F oven for 20 minutes revives it perfectly. Keeps 4 days in the fridge, 3 months frozen. I always make a double batch because it disappears fast. Store leftovers in an airtight container with a paper towel on top to keep it crispy. For serving, a sprinkle of extra sage leaves adds that restaurant-quality touch.
Why You'll Love This Recipe
- No-Fuss Prep: I swear, this stuffing comes together in one bowl—no fancy layers or baking sheets. Toss those stale bread cubes with wild rice, diced apples, and butter, then bake. That’s it. Honestly, my lazy Sunday mornings thank me.
- Apple-Sage Magic: The Granny Smiths add a sharp, bright bite that cuts through the richness, while the sage? It smells like autumn in a skillet. Between us, that first forkful makes me close my eyes—it’s that good.
- Leftovers? No Problem: This stuffing reheats like a dream—crispy edges soften just enough, and the apples stay juicy. I’ve packed it in lunches, served it at potlucks, and even used it to top grilled cheese. It’s my secret weapon for busy days.
- Budget Bright Spot: Wild rice blend and day-old bread? Total pantry staples. No need to splurge on fancy ingredients—just good, honest flavor. I’ll be real: my wallet and my taste buds both win here.
Step-by-step instructions for apple and wild rice stuffing
Here's how to create a stuffing with golden-brown edges and tender, flavorful centers that'll impress any holiday table.
Toast the Wild Rice and Bread for Maximum Flavor
In a large skillet, melt the 0.75 cup unsalted butter over medium heat. Add the 1.5 cups wild rice blend and stir constantly for 3-4 minutes until the grains turn a beautiful golden brown and become fragrant. This toasting step develops deep nutty flavors that carry through the entire dish.
Transfer the toasted rice to a large mixing bowl. In the same skillet, add the 8 cups day-old bread cubes and toast them for 5-6 minutes, stirring frequently, until they're golden and crisp around the edges. The bread should be dry to the touch—this prevents a gummy stuffing. Let both the rice and bread cool slightly before proceeding.
Sauté the Aromatic Vegetable Base
In the same skillet (no need to clean it—the fond adds flavor), add the 0.75 cup unsalted butter that remains. When melted, add the 1 medium yellow onion and 3 whole celery stalks, cooking over medium heat for 5-6 minutes until softened and translucent. Add the 2 medium Granny Smith apples, 0.5 cup fresh sage leaves, and 1 tbsp fresh thyme leaves, cooking for another 3 minutes until the apples begin to soften.
Here's where the magic happens: sprinkle the mixture with 1.5 tsp salt, 1 tsp black pepper, 1.5 tsp ground cinnamon, and 0.5 tsp ground nutmeg. Stir well to distribute the spices evenly. The nutmeg adds warmth while the cinnamon brings subtle sweetness that pairs perfectly with the apples.
Combine All Ingredients for Perfect Texture
Add the toasted bread cubes and wild rice to the skillet with the vegetable mixture. Stir gently but thoroughly to combine, breaking up any large bread chunks. Pour in the 1 cup apple cider and 1.5 cups chicken broth, mixing until everything is evenly moistened. The liquid should just barely coat the ingredients—if it looks dry, add 1-2 tablespoons water to help bind everything together.
Transfer the mixture to a large baking dish. The stuffing should be moist but not soupy—you want it to hold its shape when baked. Press down gently with your hands to compress the mixture slightly. This ensures even cooking and prevents a crumbly texture.
Bake Until Golden and Irresistible
Preheat your oven to 375°F. Cover the baking dish tightly with aluminum foil and bake for 30 minutes. After this initial baking time, remove the foil and increase the oven temperature to 400°F. Return the stuffing to the oven, uncovered, for another 15-20 minutes until the top is deep golden brown and crispy.
This two-stage baking process is key—it allows the stuffing to cook through evenly while developing that perfect crispy exterior. The stuffing is done when the internal temperature reaches 165°F and the top has a rich, caramelized color. If the edges brown too quickly, tent loosely with foil to prevent over-browning.
Rest and Serve for Maximum Juiciness
Remove the stuffing from the oven and let it rest for 10 minutes before serving. This resting period allows the juices to redistribute throughout the stuffing, ensuring every bite is moist and flavorful. If you serve it immediately, the juices will pool at the bottom of the dish.
Garnish with additional chopped fresh sage and grated nutmeg if desired. The stuffing should have a beautiful contrast of crispy golden edges with tender, aromatic centers. Serve warm alongside your holiday roast or turkey—each bite will deliver perfect balance of textures and flavors.
Pro Tips For Making Apple And Wild Rice Stuffing
- TOAST THE BREAD LOW: I learned this the hard way—dry-roasting bread cubes at 300°F for 15 minutes instead of blasting them at 375°F keeps them crisp without burning. The wild rice blend soaks up less moisture this way, and the stuffing stays light even after baking.
- COOK RICE AL DENTE: Wild rice blends need 10 minutes less than the package claims—test it at 3 minutes shy of done, then drain and spread on a tray to cool. Overcooked rice turns mushy in stuffing, and you’ll regret that soggy texture.
- GRATE APPLES COARSELY: Use a box grater with medium holes, not a food processor—tiny apple pieces turn to mush when baked. Toss the grated apples with a pinch of salt and let them sit 10 minutes before mixing; this pulls out excess liquid and keeps the texture bright.
- SAGE FIRST, THEN SALT: Chop sage leaves into ribbons and toast them in butter for 30 seconds before adding anything else. This releases their aroma, and you’ll need less salt later—trust me, the stuffing will taste deeper without overpowering the apples.
Common mistakes when making perfect results
Over-Moistening the Bread
One of the biggest mistakes is adding too much liquid when combining ingredients. The bread cubes should be dry to the touch before mixing, and the apple cider plus broth should just barely coat them—no more than 1-2 tablespoons extra water. I’ve seen stuffing turn into a soggy mess when people eyeball the liquid instead of measuring. Trust the recipe’s measurements for perfect texture. 💧
Skipping the Toasting Steps
Never skip toasting the wild rice and bread cubes—this is where deep flavor develops. The nutty aroma from toasted wild rice and crispy bread edges are essential. I once made stuffing without toasting and ended up with bland, gummy results. Use medium heat and stir constantly to avoid burning. This step takes just 5-6 minutes but makes all the difference. 🌾
Uneven Baking Temperatures
The two-stage baking method is critical: start at 375°F covered, then increase to 400°F uncovered. Skipping this or using a single temperature leads to either undercooked centers or burnt edges. I’ve had stuffing emerge from the oven dry as a rock when baked too hot too soon. The foil trap steams the stuffing while the final high-heat phase creates that golden crust. 🔥
Using Fresh Bread
Fresh bread absorbs all the moisture and turns stuffing gummy. Always use day-old bread—it’s drier and holds up better during baking. If you must use fresh bread, spread slices on a baking sheet and dry them in a 200°F oven for 1-2 hours** before cubing. I’ve made this mistake at holiday dinners and regretted it every time. 🍞
Overfilling the Baking Dish
Stuffing needs room to crisp properly. A 9x13-inch baking dish should hold about 10 cups of mixture max—any more and the center stays undercooked. I once tried doubling the recipe in a 10x15-inch pan and ended up with a dense, unappetizing center. If making a larger batch, use two smaller dishes for even browning. ⚠️
Ignoring Resting Time
Serving stuffing immediately after baking causes juices to pool at the bottom. Always let it rest for 10 minutes before serving. This simple step ensures every bite is moist and flavorful. I’ve seen guests complain about dry stuffing when hosts skip this crucial step. Patience pays off here—trust the process. 🕒
Nutrition facts
Frequently asked questions
Can I make this stuffing ahead of time?
This stuffing reheats beautifully. Prepare it up to 2 days ahead and refrigerate in an airtight container. When ready to serve, bake at 350°F for 30-40 minutes until heated through and crispy again. For longer storage, freeze portions for up to 3 months—thaw overnight in the fridge before reheating.
What's the best bread for this recipe?
Day-old sourdough or crusty French bread works best—their texture holds up perfectly. Avoid soft white bread as it turns gummy. If you must use fresh bread, dry it in a 200°F oven for 1-2 hours before cubing. For gluten-free versions, try a sturdy gluten-free loaf or use quinoa or cauliflower rice instead of bread cubes.
How do I prevent the stuffing from getting dry?
The key is balancing moisture and heat. Use the two-stage baking method (375°F covered, then 400°F uncovered) and don't overfill the baking dish. If your kitchen runs hot, tent with foil during the final 10 minutes of baking. For extra moisture, add 1-2 tablespoons apple cider when mixing ingredients if needed.
Can I make this stuffing vegetarian?
Yes! Simply substitute the chicken broth with vegetable broth and use vegan butter for toasting. The flavor remains rich and satisfying. For extra protein, stir in 1 cup cooked lentils or mushrooms with the vegetables. The recipe's natural sweetness and spices keep it hearty without meat.
Why does my stuffing turn out crumbly?
Crumbly stuffing usually means either too much liquid was added or the bread wasn't dry enough. Always use day-old bread and measure liquids precisely—they should just barely coat the ingredients. Another common cause is overmixing after adding liquids. Gently combine everything just until moistened, then press down lightly in the baking dish for even texture.