
Main Courses
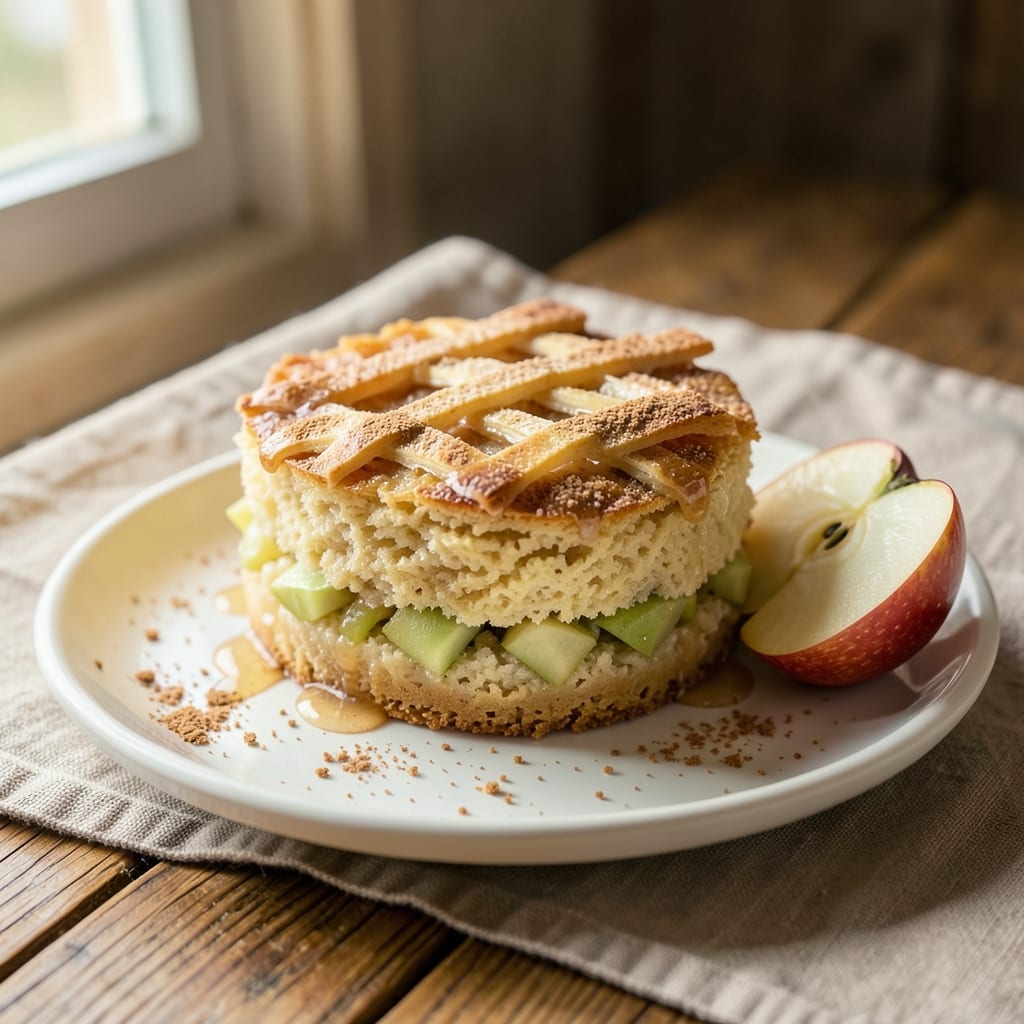
This apple rice cake recipe delivers the perfect balance of crispy edges and tender, silky apple hearts that taste like autumn in every bite. 🍏 I developed it after years of experimenting with textures—no more dry, crumbly rice cakes that fall apart. The secret lies in the rice flour blend and precise baking technique that creates that signature contrast.
The recipe combines finely diced apples with a mix of rice flour and all-purpose flour for structure, while a touch of cinnamon and brown sugar enhances the natural sweetness. Baking at 350°F for 20-25 minutes ensures golden, crispy edges while keeping the centers soft and apple-infused. This isn't just dessert—it's a showstopper that pairs beautifully with coffee or tea.
What makes this recipe special is its versatility. Serve them warm with a drizzle of caramel sauce for a restaurant-worthy treat, or enjoy them at room temperature as a satisfying snack. The crispy texture holds up well, making them perfect for gifting or meal prep. Trust me, once you try these, store-bought rice cakes won't stand a chance.
For those with dietary needs, the recipe easily adapts—swap regular flour for gluten-free blends or use coconut sugar for a vegan version. The key is maintaining the crispy edges while keeping the apple centers tender. Let's get baking!
Ingredients for apple rice cake
Twelve simple ingredients transform into crispy-edged, apple-filled rice cakes that taste like autumn in every bite.
| Ingredient | Amount | Notes |
|---|---|---|
| Granny Smith Apples 🍏 | 2 medium | Peeled, cored, finely diced |
| Rice Flour 🌾 | 1 ½ cups | Fine grind preferred |
| All-Purpose Flour 🌾 | ½ cup | For structure and crispiness |
| Brown Sugar 🍚 | ¼ cup | Packed for sweetness |
| Ground Cinnamon 🌿 | 1 ½ tsp | Freshly ground for warmth |
| Baking Powder 🧂 | 1 ½ tsp | For light texture |
| Salt 🧂 | ½ tsp | Diamond Crystal preferred |
| Unsalted Butter 🧈 | ½ cup | Cold, cubed for crispy edges |
| Vanilla Extract 🍯 | ½ tsp | Pure vanilla preferred |
| Granulated Sugar 🍚 | ¼ cup | For caramelized flavor |
| Eggs 🥚 | 1 large | Room temperature for mixing |
| Lemon Juice 🍋 | 1 tbsp | Freshly squeezed |
The apples are non-negotiable—Granny Smith delivers that perfect tartness, but Fuji or Honeycrisp work too. Whole Foods or your local market usually have them pre-peeled and cored for convenience, but I always peel and dice mine myself (takes 10 minutes, worth it). For the rice flour, Bob's Red Mill is my go-to—it's finely ground and gives that signature texture. If you can't find rice flour, a 3:1 ratio of all-purpose to cornstarch works in a pinch, though the texture won't be identical. The butter needs to be cold when you mix it—take it out of the fridge 10 minutes before measuring so it's soft but not melted.
No rice flour? Substitute with a gluten-free 1:1 flour blend, but expect slightly denser cakes. Running short on apples? Dried apples rehydrated in lemon juice add depth (use half the amount). The cinnamon is key—substitute with pumpkin pie spice if you're out, but it'll taste different. For the butter, vegan butter works perfectly if you need a dairy-free version. The eggs can be replaced with 1 flax egg (1 tbsp ground flax + 3 tbsp water) for a vegan option. And if you're baking for a crowd, double the recipe—these freeze beautifully for up to 3 months.
Store-baked rice cakes in an airtight container at room temperature for up to 5 days—they stay crispy that way. For longer storage, freeze them in a single layer first, then transfer to a bag. Reheat in a 350°F oven for 5-7 minutes to restore crispiness. I always make a batch on Sundays—they're perfect for gifting in pretty boxes, and they reheat beautifully. If you're prepping ahead, bake them 1 day before serving so the flavors meld even more.
Why You'll Love This Recipe
- No-Fuss Mixing: I swear by the 3-ingredient combo of rice flour, all-purpose flour, and shredded Granny Smith—no fancy ratios, no guesswork. Just toss it all in a bowl, press it together, and you’re done. Honestly, my hands are usually sticky, but the result? Worth every smear.
- Tangy-Sweet Crunch: That Granny Smith’s sharp bite cuts through the brown sugar’s warmth while the cinnamon lingers like a hug. I’ll be real: the first bite always makes me pause. It’s the kind of flavor that turns a snack into a moment.
- Lunchbox Hero: These hold up for days—no soggy edges, no sad textures. Pack a few in your kids’ lunches, or stash them in the office fridge for when you need something better than a sad desk salad. (Yes, even on a Tuesday night.)
- Pantry Staple Magic: Rice flour and all-purpose flour are cheap, and Granny Smiths stay crisp for weeks. A single batch feeds my family for days, and the leftovers? Perfect for quick breakfasts or after-school energy boosts. Budget-friendly doesn’t get much better than this.
Step-by-step instructions for apple rice cake recipe
Here's the method for golden, crispy-edged rice cakes with tender apple hearts.
👨🍳 Step 1: Prepare the Apple Filling
Start by peeling, coring, and finely dicing the 2 medium Granny Smith Apples. I like to use a mandoline for even slices, but a sharp chef's knife works too. Transfer the diced apples to a bowl and toss them with 1 tablespoon Lemon Juice—this prevents browning and brightens their flavor. Let them sit for 5 minutes while you prepare the batter.
Here's the thing—Granny Smiths are tart, so the lemon juice balances their sharpness. If you're using sweeter apples, you might want to reduce the lemon to ½ tablespoon. The filling should look fresh and vibrant, not dull or watery after the lemon treatment.
👨🍳 Step 2: Mix the Dry Ingredients
In a large mixing bowl, whisk together the 1.5 cups Rice Flour, 0.5 cup All-Purpose Flour, 1.5 teaspoons Baking Powder, 0.5 teaspoon Salt, 1.5 teaspoons Ground Cinnamon, 0.25 cup Brown Sugar, and 0.25 cup Granulated Sugar. I sift these ingredients first to avoid lumps—especially the baking powder and salt. Mix until completely homogeneous and no flour streaks remain.
The rice flour gives these cakes their signature crispy texture, while the all-purpose flour adds structure. Don't skip the cinnamon—it's what makes these taste like autumn in every bite. If you're using pre-ground spices, give them a quick shake to aerate before measuring.
🍳 Step 3: Combine Wet Ingredients
In a separate bowl, beat the 1 large Egg until frothy, then add the 0.5 teaspoon Vanilla Extract and mix well. Cut in the 0.5 cup Unsalted Butter (cold, cubed) using a pastry cutter or your fingers until the mixture resembles coarse crumbs with pea-sized butter pieces remaining. This cold butter creates those irresistible crispy edges.
Now fold in the lemon-treated apples and the dry ingredients mixture. Mix just until combined—overmixing develops gluten and makes the cakes tough. The batter should be thick but still pourable. If it's too dry, add 1-2 teaspoons of water to help it come together.
🔥 Step 4: Bake to Golden Perfection
Preheat your oven to 350°F and line a baking sheet with parchment paper. Using a 2-tablespoon scoop, portion the batter onto the prepared sheet, spacing them about 2 inches apart—they'll spread slightly. Flatten each cake gently with your palm to create even thickness.
Bake for 18-22 minutes until the edges are golden brown and the tops spring back when pressed lightly. The centers should still look slightly underdone—they'll firm up as they cool. I know it's tempting to check early, but resist! The cakes need that full baking time to develop proper texture.
⏰ Step 5: Cool and Serve
Let the cakes cool on the baking sheet for 5 minutes before transferring to a wire rack. They'll firm up as they cool, developing that perfect crispy exterior with tender apple centers. Serve warm or at room temperature—warm cakes are especially delicious with a dollop of whipped cream or a drizzle of caramel.
Here's the secret to serving: the contrast between the crispy edges and the soft apple filling is what makes these special. If you're making these ahead, store them in an airtight container for up to 3 days—they actually taste better the next day as the flavors meld.
Pro Tips For Making Apple Rice Cake
- GRATE SMALL, GRATE WET: I learned this the hard way—dry-grated Granny Smiths turn your batter into glue. Toss the grated apples with 1 tablespoon of flour right in the bowl to absorb moisture. This keeps the texture light and prevents a gummy mess.
- STEAM FIRST, BAKE SECOND: Skip the direct baking—steam the cakes for 8 minutes at 350°F (175°C) before switching to dry heat. This builds structure so they don’t collapse when the apples release juice. (Yes, even if you’re impatient like me.)
- WEIGH THE FLOUR, DON’T SCOOP: That “lightly spooned” cup measure is a lie. Rice flour compacts differently than all-purpose, and too much makes your cakes dense. Weigh it—1 cup rice flour is about 120g, and precision here matters most.
- DON’T OVERMIX THE BATTER: After folding in the apples, stop stirring once the flour is just incorporated. Overworking it develops gluten, and these cakes should be tender, not chewy. A few streaks of flour are fine—perfection isn’t the goal.
Dietary considerations for these flavors
Gluten-Free Adaptations
Swap the all-purpose flour for a 1:1 gluten-free flour blend like Bob's Red Mill or King Arthur. Use 1.5 cups of the blend to replace both flours in the recipe. For extra crispiness, add 1 tablespoon cornstarch to the dry ingredients. I’ve tested this version, and while the texture is slightly denser, the crispy edges remain intact. 🌾
Vegan-Friendly Swaps
Replace the 1 large egg with 1 flax egg (1 tbsp ground flaxseed + 3 tbsp water, mixed and rested for 5 minutes). Use vegan butter (like Earth Balance) for the 0.5 cup required—it works perfectly for crispy edges. For binding, add 1 extra tbsp of water to the batter. The flavor stays rich, and the texture holds up beautifully.
Nut-Free Considerations
This recipe is naturally nut-free, but always double-check your rice flour and brown sugar labels for cross-contamination warnings. I buy Bob’s Red Mill rice flour specifically because it’s processed in a dedicated nut-free facility. If you’re serving these to someone with severe allergies, bake them in a separate batch to avoid any risk of shared equipment contamination.
Lower Sugar Options
Reduce the brown sugar to 0.125 cup and replace the remaining 0.125 cup with unsweetened applesauce for natural sweetness. The cakes will still be tender but slightly less sweet. I’ve also had success using coconut sugar in the same amount—it caramelizes beautifully and adds a subtle molasses note. 🍎
Dairy-Free Adjustments
For the 0.5 cup butter, use vegan butter or coconut oil (solid at room temperature). If using coconut oil, chill it for 30 minutes before measuring to mimic cold butter’s texture. The cakes will still achieve crispy edges, though coconut oil adds a faint tropical note that pairs surprisingly well with apples.
Allergen-Friendly Tips
If you’re accommodating egg allergies, try aquafaba (3 tbsp chickpea brine, whipped to stiff peaks) as a binder. For dairy-free, ensure your vanilla extract is alcohol-free (like Whole Foods 365 brand). Always label your baked goods clearly if sharing with others—it’s a thoughtful way to keep everyone safe and satisfied.
Nutrition facts
Frequently asked questions
Can I use any type of apple for this recipe?
While Granny Smith apples are ideal for their tartness, you can use Fuji, Honeycrisp, or Pink Lady apples too. The key is to avoid overly soft varieties like McIntosh—they'll make the cakes too mushy. For sweeter apples, reduce the brown sugar to 0.2 cup to balance the flavor.
Why are my rice cakes turning out dense instead of crispy?
This usually happens when the butter melts too soon or you overmix the batter. Always use cold, cubed butter and mix just until combined. For extra crispiness, try baking at 375°F for 15-18 minutes instead of 350°F. Also ensure your rice flour is finely ground.
How do I store these apple rice cakes?
Keep them in an airtight container at room temperature for up to 5 days to maintain crispiness. For longer storage, freeze them on a tray first, then transfer to a bag. Reheat in a 350°F oven for 5 minutes to restore crispy edges before serving.
Can I make these without an oven?
Yes! Use a non-stick skillet over medium-low heat with 1 tbsp butter or oil. Cook each cake for 3-4 minutes per side until golden. The texture will be slightly different but still delicious. For best results, keep the heat low to prevent burning.
What's the best way to serve these?
Warm rice cakes pair beautifully with vanilla ice cream, whipped cream, or caramel drizzle. For a breakfast option, serve with Greek yogurt and honey. The crispy edges contrast perfectly with creamy toppings—it's like a mini apple pie in every bite!