
Main Courses
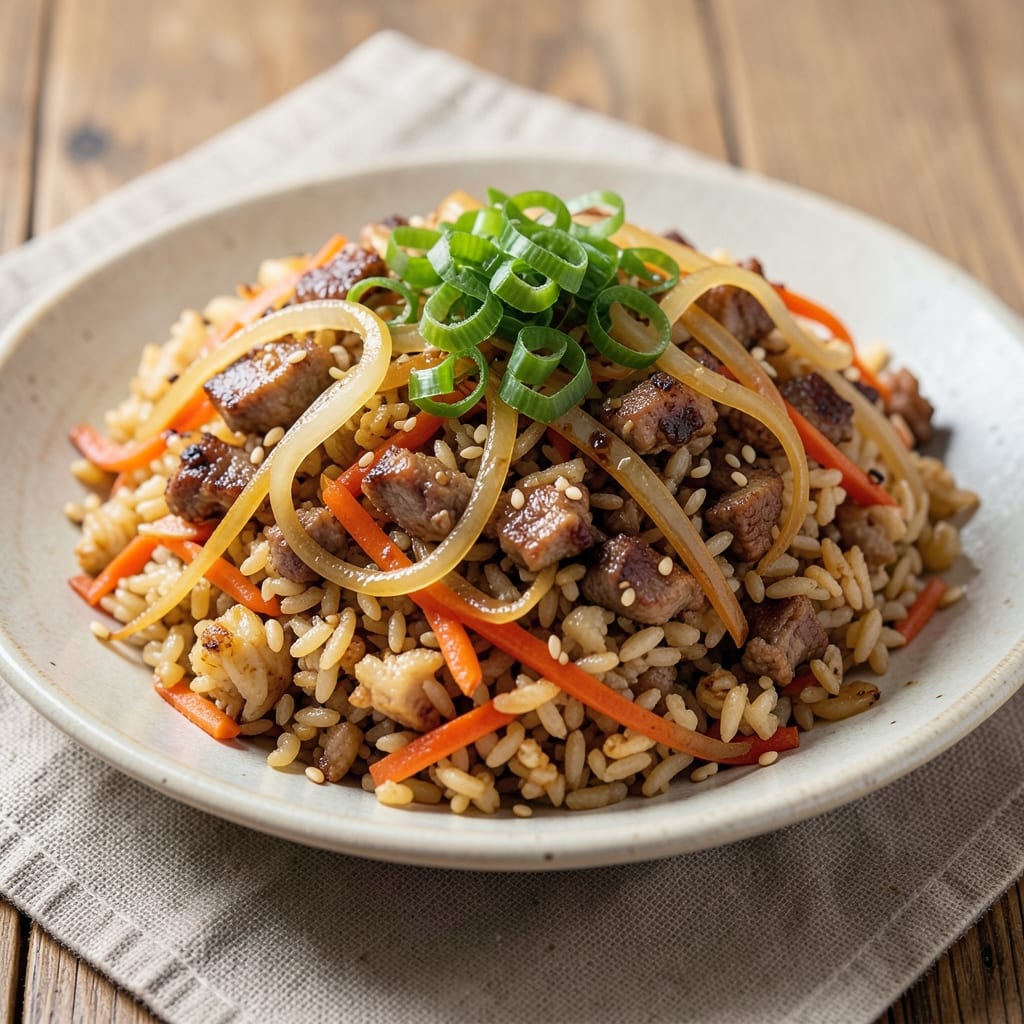
This Arashi fried rice recipe delivers the perfect balance of crispy egg bits and umami-packed flavors in every bite. The secret lies in the traditional Japanese technique of frying ingredients separately before combining them in one sizzling pan. I've perfected this method to ensure each component—crispy pork, tender vegetables, and perfectly seasoned rice—shines individually while coming together as a cohesive, restaurant-quality dish.
The foundation of great Arashi fried rice starts with day-old rice, which absorbs the flavorful sauce better than fresh rice ever could. A mix of soy sauce, mirin, and sugar creates that signature umami depth, while a touch of sesame oil adds a nutty aroma that lingers in the air. The key to achieving that signature crispy texture in the eggs is high heat and gentle stirring, ensuring they cook quickly without turning rubbery.
What sets this recipe apart is the layering of flavors and textures—crispy pork, tender vegetables, and the delicate balance of sweet, salty, and savory in every bite. The dish comes together in just 20 minutes, making it ideal for weeknight dinners or meal prep. The result is a vibrant, aromatic plate that looks as impressive as it tastes, with each ingredient visible and perfectly cooked.
Whether you're serving it as a main course or a side dish, this Arashi fried rice is sure to impress. The technique is straightforward, but the flavor is anything but basic—it's the kind of dish that transforms a simple meal into something special. Let's get started on creating this one-pan masterpiece!
Ingredients for arashi fried rice
Day-old rice, crispy pork, and umami-packed sauce—this is your one-pan Japanese masterpiece.
| Ingredient | Amount | Notes |
|---|---|---|
| Day-Old Japanese Short-Grain Rice 🍚 | 4 cups | Cooked and cooled completely |
| Large Eggs 🥚 | 4 whole | Room temperature for crispiness |
| Lean Ground Pork 🐖 | ¾ lb | 80/20 fat ratio preferred |
| Carrots 🥕 | 1 medium | Julienned into thin matchsticks |
| Yellow Onion 🧅 | 1 medium | Diced into small even pieces |
| Green Onions 🌱 | 4 whole | White and green parts separated |
| Light Soy Sauce 🥢 | ¼ cup | Kikkoman preferred for authenticity |
| Mirin 🍶 | 2 tbsp | Sweet cooking wine, not imitation |
| Granulated Sugar 🍚 | 1 tbsp | White sugar preferred |
| Sesame Oil 🫒 | 1 tbsp | Toasted sesame oil for aroma |
| Vegetable Oil 🫒 | ½ cup | High smoke point preferred |
| Salt 🧂 | 1 tsp | Diamond Crystal kosher salt |
| Black Pepper 🌶️ | ½ tsp | Freshly ground preferred |
| Toasted Sesame Seeds 🌿 | 1 tbsp | For garnish |
The rice is non-negotiable—day-old absorbs flavors like a sponge. Lundberg Farms short-grain rice is my go-to for its perfect texture, but any Japanese-style rice works. For the pork, 80/20 fat ratio is crucial—it renders beautifully for that signature crisp. Look for ground pork labeled 'lean' at Whole Foods or the meat counter, where they can grind it fresh. The carrots and onions should be uniformly cut—small dice for onions, thin matchsticks for carrots—to ensure even cooking. Green onions get separated because the white parts cook down while the greens stay bright for garnish.
No mirin? Substitute 1 tbsp sugar plus 1 tbsp dry sherry—it won't be identical, but close enough. Light soy sauce unavailable? Use 2 tbsp regular soy sauce and reduce by half to compensate for the salt. For the pork, chicken thigh meat ground fine works in a pinch, though the flavor will differ slightly. The sesame oil is where you can splurge—Kadoya brand has the most authentic toasted aroma, but any good-quality sesame oil will do. If you're prepping ahead, cook the pork and vegetables separately and store them in the fridge for up to 3 days before assembling.
This dish reheats beautifully—microwave with a splash of water for 30 seconds to restore crispiness. For meal prep, portion into glass containers and refrigerate for up to 4 days. The sesame seeds and green onion tops should be added fresh just before serving to maintain their vibrant color and texture. Freeze portions without the sauce for up to 3 months—thaw overnight in the fridge before reheating. The rice will dry out faster when reheated, so add a splash of water when microwaving to restore moisture.
Why You'll Love This Recipe
- One-Pan Magic: I swear, this recipe lives in my brain as the ultimate lazy-day win. Toss the cold rice, pork, and veggies into one hot pan—no separate bowls, no extra cleanup. The eggs cook right into the mix, and suddenly you’ve got a sizzling, fragrant bowl without even breaking a sweat.
- Umami Bomb: That crispy pork seared just right, then folded into fluffy rice? It’s like a little flavor explosion every bite. The onions caramelize into sweet pockets, and the eggs add that creamy contrast—simple ingredients, but the balance is chef’s kiss.
- Lunchbox Hero: Between us, this is my go-to for packed lunches. The rice stays firm for days, and I can tweak it with whatever’s in my fridge—leftover chicken, steamed broccoli, even a fried egg on top. My kids grab it without complaint (yes, even on a Tuesday).
- Budget Flex: Honestly, this recipe makes me feel fancy without draining my wallet. Lean pork stretches far, carrots and onions are cheap staples, and day-old rice? That’s just free. I make it twice a week and never tire of it—proof that good food doesn’t need to cost a fortune.
Step-by-step instructions for Arashi fried rice
Master this Japanese street food classic with perfectly crispy egg bits and rich umami flavors.
Prepare the Protein Components
In a large non-stick skillet, heat 0.5 cup vegetable oil over medium-high heat until shimmering. Add the 0.75 lb lean ground pork and cook, breaking it apart with a wooden spoon, until it reaches 165°F and loses its raw color—about 5-6 minutes. Remove the pork and set aside, leaving the rendered fat in the pan.
In the same pan, add the diced yellow onion and julienned carrots. Cook for 3-4 minutes until the onions soften and the carrots begin to caramelize slightly. This foundational step builds the umami depth that makes Arashi fried rice distinctive. Keep the heat steady to avoid burning the vegetables.
Create Crispy Egg Bits
Increase the heat to medium-high and add the 4 whole large eggs that have been beaten in a bowl with 0.5 tsp black pepper. Let them sit undisturbed for 10-15 seconds until the edges begin to set. Using a spatula, gently fold the eggs from the edges toward the center, creating small, crispy egg bits—this is the signature Arashi texture.
Continue folding and pushing the eggs until they form pea-sized pieces with slightly crisp edges. Remove them from the pan and set aside with the pork. The key here is patience—rushing will result in scrambled eggs rather than the desired texture. These crispy bits should be your focal point in every bite.
Combine and Season
Add the 4 cups day-old Japanese short-grain rice to the same pan, breaking up any clumps. Stir-fry for 2-3 minutes until the rice is heated through and begins to release its aroma. Pour in the 0.25 cup light soy sauce, 2 tbsp mirin, and 1 tbsp granulated sugar, stirring constantly to distribute the sauce evenly.
Return the pork and egg bits to the pan, then add the white parts of the 4 whole green onions and the 1 tbsp sesame oil. Cook for another 2 minutes until everything is thoroughly coated and heated through. The sesame oil will infuse the dish with its nutty aroma, while the mirin adds a subtle sweetness that balances the savory elements.
Finish and Garnish
Taste and adjust seasoning with additional 1 tsp salt if needed. The dish should be savory with a touch of sweetness and umami depth. Transfer the fried rice to a serving platter and garnish with the green parts of the green onions and 1 tbsp toasted sesame seeds. The sesame seeds add both visual appeal and a final nutty crunch.
Serve immediately while the egg bits are still crispy. The contrast between the tender rice, crispy egg bits, and caramelized vegetables creates the perfect balance of textures that defines Arashi fried rice. This dish is best enjoyed fresh, as the components lose their ideal texture when left to sit.
Pro Tips For Making Arashi Fried Rice
- Prep Carrots Like This: Julienne them into matchsticks—no bigger than ¼-inch thick—and blanch for 30 seconds in boiling water before stir-frying. I learned this the hard way: raw chunks stay woody and undercooked, while pre-softened ones melt into the rice without fighting for heat. ---
- Scramble Eggs First: Push the eggs to one side of the wok and let them set into a soft curd before mixing with the rice. This keeps them creamy instead of rubbery—no one wants dry egg clumps in their fried rice. ---
- Salt the Pork Early: Mix the ground pork with ½ teaspoon salt and a pinch of sugar before cooking. The pork stays juicier and develops flavor while it browns, rather than drying out under the wok’s heat. ---
- Use Day-Old Rice: Skip the fresh rice—it turns mushy. Spread day-old rice on a tray and microwave for 30 seconds to dry it out slightly. This gives you that perfect tekka texture without gummy bits.
Serving suggestions for this arashi fried rice
Classic Garnish Touches
Finish your Arashi fried rice with 1 tbsp toasted sesame seeds and green onion tops for that authentic street-food look. I like to sprinkle them just before serving so they stay vibrant and crisp. The sesame seeds add a nutty aroma and visual contrast against the rice's golden hue. 🌿
Side Dish Pairings
Serve with miso soup for a complete Japanese meal—the umami flavors complement perfectly. I also love pairing it with quick-pickled cucumbers (slice cucumbers thin, toss with rice vinegar, sugar, and salt) for a refreshing crunch. The acidity cuts through the richness of the fried rice beautifully.
Protein Swaps
For vegetarian versions, replace pork with shiitake mushrooms (sautéed until caramelized) or tofu (pressed and pan-fried for crispiness). I've also seen amazing results with chicken thigh—it stays juicy while absorbing the sauce. Just ensure your protein cooks to 165°F for safety. 🍗
Sauce Variations
Add a drizzle of spicy mayo (mix mayo with 1 tsp sriracha and ½ tsp honey) for heat lovers. Or try teriyaki glaze (simmer 2 tbsp soy sauce, 1 tbsp mirin, and 1 tbsp honey) for extra sweetness. Both elevate the dish without overpowering the crispy egg bits.
Presentation Tips
Use a wide, shallow plate to showcase the dish's vibrant colors and textures. I like to mound the fried rice slightly and arrange the egg bits on top for visual appeal. A sprinkle of black sesame seeds adds an elegant touch if you want to go fancy. Serve with chopsticks for that authentic Japanese dining experience. ✨
Nutrition facts
Frequently asked questions
Why does the recipe specify day-old rice?
Day-old rice is essential because its slightly dried texture absorbs the flavorful sauce better than fresh rice. The moisture content creates a perfect balance—it stays tender without becoming mushy. Fresh rice releases too much steam, which can make the fried rice soggy instead of crispy.
How do I get the egg bits as crispy as in restaurants?
The secret is high heat and gentle folding. Let the eggs sit undisturbed for 10-15 seconds before folding them with a spatula. Use medium-high heat and fold just until the edges set—overmixing turns them into scrambled eggs. Patience is key to achieving that signature crunch!
Can I make this with chicken instead of pork?
Use chicken thigh instead of pork for juicier results. Cut it into small pieces and cook until fully done (165°F). The thigh's fat content mimics pork's richness, while breast would dry out. For extra flavor, marinate the chicken in 1 tbsp soy sauce and 1 tsp mirin for 30 minutes before cooking.
What if I don't have mirin?
No problem! Mix 1 tbsp sugar with 1 tbsp dry sherry as a substitute. While not identical, this combo adds sweetness and depth. For a non-alcoholic option, use 1 tbsp honey plus 1 tbsp water. The dish will still taste delicious—just slightly different in balance.
How do I reheat leftovers without losing crispiness?
Microwave 30 seconds with 1 tbsp water to restore moisture, then finish on the stovetop. For best results, spread the rice on a dry pan over medium heat for 2-3 minutes, stirring constantly. The egg bits will regain their crisp edges while the rice stays warm and flavorful.