
Main Courses
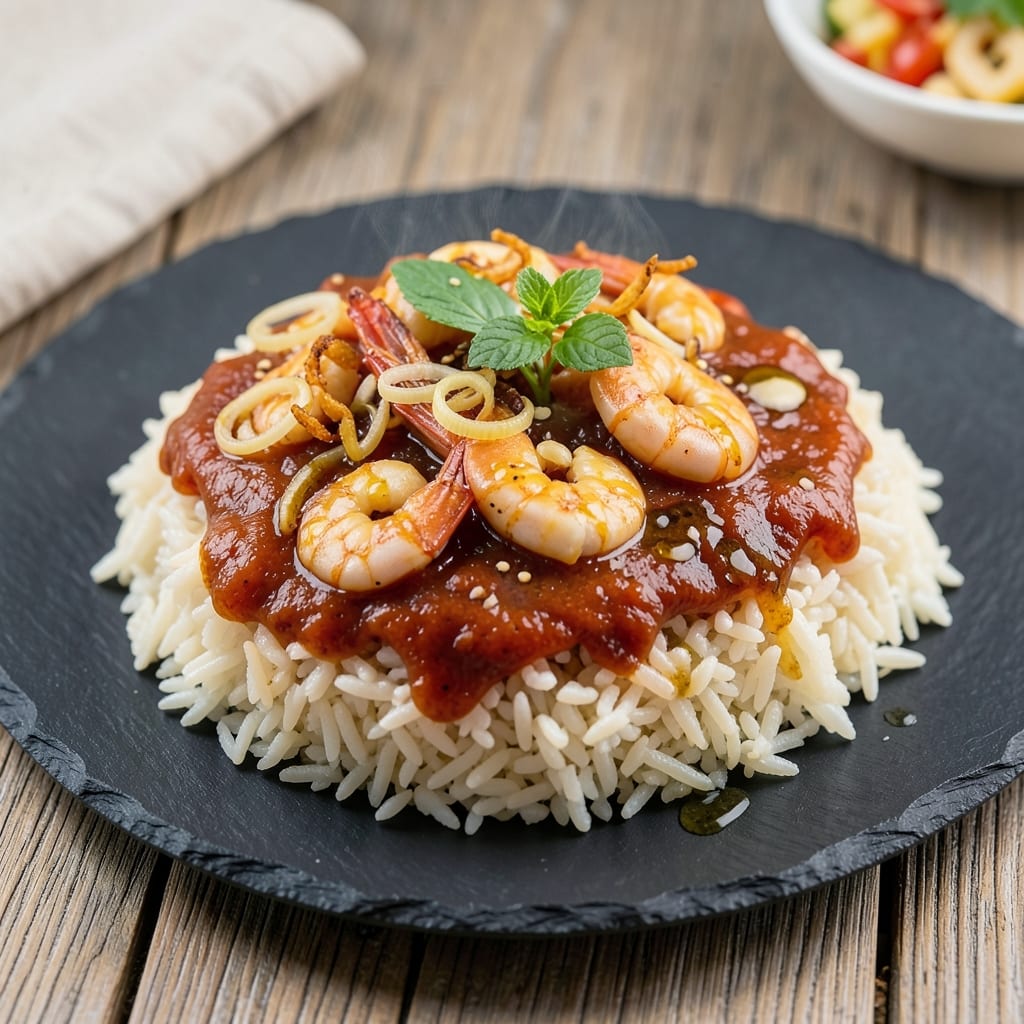
This Arirang fried rice recipe brings bold Korean flavors to your weeknight table with a crispy, umami-packed twist that takes just 20 minutes. The secret lies in perfectly stir-fried rice coated in a savory-sweet sauce, topped with crunchy fried shallots and a soft-boiled egg for that signature restaurant texture. I developed this version after years of perfecting the balance between smoky, caramelized edges and tender, flavorful grains—it’s the kind of dish that transforms simple ingredients into something extraordinary.
The magic happens in the stir-fry technique: high heat, quick cooking, and constant motion to avoid mushy rice. We’ll use day-old rice (or chilled fresh rice) for that ideal texture, combined with gochujang for depth, soy sauce for umami, and a touch of sugar to balance the heat. The protein—whether shrimp, chicken, or tofu—gets cooked separately to ensure it stays juicy and tender, then tossed in at the end for maximum flavor absorption. This isn’t just fried rice; it’s a restaurant-quality dish that’s foolproof for home cooks.
By the time you serve this dish, your kitchen will smell like a bustling Korean pojangmacha (street food stall), and every bite will deliver that perfect mix of crunchy shallots, creamy egg yolk, and savory rice. The dish is hearty enough for a main course but flexible enough to pair with miso soup or quick pickles for a full meal. Whether you’re feeding a crowd or craving a solo comfort meal, this recipe delivers bold, satisfying flavor without the fuss.
For extra authenticity, garnish with sesame seeds and green onions, and serve with a side of kimchi for tangy contrast. The best part? Leftovers reheat beautifully, making this an ideal meal-prep-friendly dish. Let’s get cooking—your taste buds (and dinner guests) will thank you.
Ingredients for arirang fried rice
Bold Korean flavors meet crispy textures in this restaurant-quality fried rice—just 14 ingredients, 20 minutes.
| Ingredient | Amount | Notes |
|---|---|---|
| Day-Old Cooked White Rice 🍚 | 4 cups | Chilled for optimal texture |
| Gochujang 🌶️ | 2 tbsp | Korean red chili paste |
| Soy Sauce 🥫 | 2 tbsp | Low-sodium preferred |
| Sesame Oil 🫒 | 1 tbsp | Toasted for aroma |
| Rice Vinegar 🍶 | 1 tbsp | White or seasoned |
| Granulated Sugar 🍚 | 1 tbsp | Balances heat |
| Vegetable Oil 🫒 | 3 tbsp | High smoke point |
| Large Eggs 🥚 | 2 whole | Soft-boiled preferred |
| Shallots 🧅 | 4 whole | Thinly sliced |
| Green Onions 🌱 | ¼ cup | Thinly sliced |
| Toasted Sesame Seeds 🌰 | 1 tbsp | For garnish |
| Protein Choice (Shrimp, Chicken, or Tofu) 🍗 | 1 lb | Cooked separately |
| Salt 🧂 | ½ tsp | Adjust to taste |
| Black Pepper 🌶️ | ¼ tsp | Freshly ground |
Gochujang is the soul of this dish—Maesilchun or Dongwon brands deliver that perfect balance of sweet and heat. Grab it in the Asian aisle, not the international section where it often sits forgotten. The rice? Day-old is ideal, but if you’re using fresh, chill it for 30 minutes first. Jasmine or short-grain rice works best—basmati gets too dry. For the protein, shrimp cooks fastest, so prep it first if using. The shallots? Thai bird’s eye or Korean pearl shallots add extra crunch, but regular shallots work too.
No gochujang? Mix 1 tbsp sriracha with 1 tbsp honey for a quick substitute. Swapping proteins? Chicken breast cuts into bite-sized pieces works best—thighs are too fatty. Tofu? Press and cube extra-firm for texture. The sesame oil can be skipped if you’re sensitive to its flavor, but trust me, it’s worth the nutty aroma. For a smokier profile, add 1/4 tsp smoked paprika to the sauce. The sugar balances the heat, but if you prefer less sweetness, reduce it to 1/2 tbsp.
This reheats like a dream—microwave 2 minutes with a splash of water for crispy edges. Store leftovers in an airtight container for 4 days in the fridge or freeze for 3 months. For meal prep, cook the rice and protein ahead, then assemble fresh to keep everything crisp. Garnish with extra sesame seeds and green onions right before serving—freshness matters. Pair with kimchi or miso soup for the full Korean experience.
Why You'll Love This Recipe
- No-Chop Magic: I swear by this trick—just break up that day-old rice with my hands while the wok heats. No knife, no mess, just the satisfying sizzle of gochujang hitting the pan. That first spoonful of rice vinegar? Instant brightness—no fancy technique needed.
- Umami Bomb: The gochujang and soy sauce combo is where this dish gets its soul. It’s not just spicy; it’s deep, with that sticky-sweet fermented kick that clings to every grain. A drizzle of sesame oil at the end? Pure flavor payoff—no overpowering, just rich, toasty perfection.
- Lunchbox Hero: Between us, this is my go-to for packed lunches. The rice holds up for days, and the flavors only get better as it sits. Add a fried egg or quick-pickled veggies, and you’ve got a meal that’s actually exciting to unpack—no sad, soggy leftovers here.
- Pocketbook Win: Honestly, this recipe costs me pennies but feels like a restaurant dish. A single spoon of gochujang stretches across multiple meals, and I’m using rice I’d otherwise toss. It’s the kind of budget-friendly magic that makes me question why I ever order takeout.
Step-by-step instructions for Korean-inspired umami fried rice
Here's how to transform simple ingredients into restaurant-quality Arirang fried rice with bold flavors and perfect texture.
Prepare the Protein and Aromatics
Start by cooking your chosen protein separately. For shrimp, sauté in 1 tablespoon vegetable oil over medium heat for 2-3 minutes until just pink, then set aside. For chicken or tofu, cook until fully done and cut into bite-sized pieces. While the protein cooks, thinly slice the 4 whole shallots and 0.25 cup green onions—these should be paper-thin for even cooking and maximum flavor.
I like to use a sharp chef's knife for the shallots, making quick diagonal cuts to create uniform slices. These aromatics will caramelize beautifully during cooking, adding sweet depth to the dish. Keep them separate from the protein until you're ready to combine everything at the end.
Create the Flavor Base
In a large nonstick skillet, heat 3 tablespoons vegetable oil over medium-high heat until shimmering. Add the 4 cups day-old cooked white rice, breaking up any clumps with a spatula. Cook undisturbed for 2-3 minutes until the rice begins to sizzle and turn golden in spots—this creates that coveted crispy texture.
Stir in the 2 tablespoons gochujang, 2 tablespoons soy sauce, 1 tablespoon rice vinegar, and 1 tablespoon granulated sugar, mixing well to coat every grain. Let it cook for 1 minute while the flavors meld together. The gochujang will deepen in color and the rice will develop that signature umami richness. This is where the magic happens—don't rush this step.
Incorporate Eggs and Aromatics
Push the rice to one side of the skillet, creating space in the center. Add 1 tablespoon sesame oil and pour in the 2 whole large eggs, letting them spread naturally. Cook for 30-45 seconds until the edges just begin to set, then gently scramble with a spatula until softly curdled but still slightly runny—this creates that perfect creamy texture in each bite.
Add the cooked protein and sliced shallots to the skillet, stirring everything together. Cook for another 2 minutes until the shallots soften slightly and the protein heats through. The rice should be hot but still slightly sticky—this indicates it's ready for the final touches. If it's too dry, add 1-2 tablespoons water to restore moisture.
Finish with Garnishes and Serve
Remove the skillet from heat and stir in the 0.25 cup sliced green onions and 0.5 teaspoon salt. Taste and adjust seasoning with 0.25 teaspoon black pepper if needed. The dish should balance sweet, spicy, savory, and umami flavors perfectly. For that final touch, sprinkle 1 tablespoon toasted sesame seeds over each serving.
Serve immediately while the rice is still hot and the aromatics are fragrant. The combination of crispy rice, creamy eggs, and caramelized shallots creates a symphony of textures and flavors that's pure comfort food. This dish tastes even better the next day as the flavors continue to develop!
Pro Tips For Making Arirang Fried Rice
- USE COLD RICE: Grab that leftover rice straight from the fridge—no thawing needed. Cold rice fries up lighter and less gummy, and the shock of heat when it hits the pan gives you that perfect texture. (Yes, even if you’re impatient like me.)
- SAUTE GOCHUJANG FIRST: Toss in the gochujang with a splash of water or rice vinegar before adding the rice—this prevents clumping and lets it bloom into that deep, sticky flavor. After burning three batches where it just sat in lumps, I finally learned: heat it up alone for 30 seconds first.
- SALT THE RICE: Sprinkle a pinch of salt over the cold rice before frying—it crisps the edges and balances the gochujang’s heat. I used to skip this, and the dish always tasted flat until I tried it. (Your future self will thank you.)
- STOP WHEN IT LOOKS DONE: Pull the rice off the heat the second it’s evenly coated and slightly sticky—it’ll keep cooking from residual heat. Overcooking turns it dry, and that’s a mistake I made until I started tasting a bite mid-fry. Trust the process.
Common mistakes when making your arirang fried rice
Overcrowding the Pan
One of the biggest mistakes is using a pan that's too small for your rice quantity. When you overcrowd the pan, the rice steams instead of developing those beautiful crispy edges. I learned this the hard way—my first attempt used a 10-inch skillet for 4 cups of rice, and the result was soggy, unevenly cooked grains. Invest in a 12-inch nonstick skillet or larger for this recipe. If you're short on space, work in batches but keep the heat high to maintain texture. 🔥
Skipping the Day-Old Rice
Freshly cooked rice is too moist and will turn mushy when stir-fried. I've seen people use fresh rice straight from the pot, and the texture suffers—it sticks together and loses that perfect crispy bite. If you absolutely must use fresh rice, chill it in the fridge for at least 30 minutes before cooking. The starches firm up, creating that ideal texture. For best results, use day-old rice that's cooled to room temperature.
Cooking Protein Too Long
Many home cooks overcook the protein, especially shrimp or chicken, making it dry and rubbery. The key is to cook it just until it's done—shrimp should turn pink in 2-3 minutes, while chicken should reach 165°F internal temperature. I recommend cooking proteins separately and adding them at the very end to keep them juicy. For shrimp, I pull them out when they're just barely opaque—they'll finish cooking in the hot rice.
Not Using High Enough Heat
Low heat creates steamed rice instead of crispy, caramelized grains. You need medium-high to high heat to develop those golden brown spots that add texture and flavor. I use a 12-inch cast iron skillet on the stovetop burner set to medium-high (about 375°F). If your burner runs hot, adjust to medium to prevent burning. The rice should sizzle loudly when you add it—if it's not sizzling, your heat is too low.
Adding All Ingredients at Once
Dumping everything into the pan simultaneously leads to uneven cooking and flavor distribution. The eggs, protein, and aromatics all have different cooking times and temperatures. I follow this order:
- rice with sauce,
- eggs,
- protein and shallots. This ensures each component gets the attention it needs. The eggs should be soft and slightly runny when added, while the protein needs to heat through quickly without overcooking.
Ignoring the Sauce Development Time
Rushing the sauce integration means missing out on that deep umami flavor. After adding the gochujang, soy sauce, and sugar, let it cook for at least 1 minute while stirring constantly. This allows the gochujang to deepen in color and the flavors to meld together. I've seen people add the sauce and immediately add the eggs—this cuts the sauce development time by half, resulting in a less flavorful dish. Patience here makes all the difference! ✨
Nutrition facts
Frequently asked questions
Why does this recipe use day-old rice instead of fresh?
Day-old rice has firmer starches that create perfect crispy edges when stir-fried, while fresh rice turns mushy and sticky. If you only have fresh rice, chill it for 30 minutes first to mimic the texture. The key is avoiding overly moist grains that won't develop that signature crunch.
Can I make this vegetarian or vegan?
Swap the protein for extra-firm tofu (pressed and cubed) or mushrooms like shiitake. For vegan, use vegan gochujang and check your sesame oil is plant-based. The dish still delivers bold flavors without meat.
How do I adjust the spice level?
Start with 1 tbsp gochujang for mild heat, then increase to 2 tbsp for medium. For extra spice, add ½ tsp red pepper flakes or a drizzle of gochugaru (Korean red pepper flakes). The rice vinegar helps balance any heat.
What's the best way to reheat leftovers?
Microwave 2 minutes with 1 tbsp water to restore crispiness. For stovetop, heat in a dry pan over medium-high heat for 3-4 minutes, stirring constantly. Leftovers keep for 4 days in the fridge or 3 months frozen.
Can I use brown rice or cauliflower rice?
Brown rice works but needs 10% more liquid and longer cooking time. Cauliflower rice is possible but lacks the starch for proper texture—it'll be drier. For best results, stick with jasmine or short-grain white rice for that signature stickiness.