
Main Courses
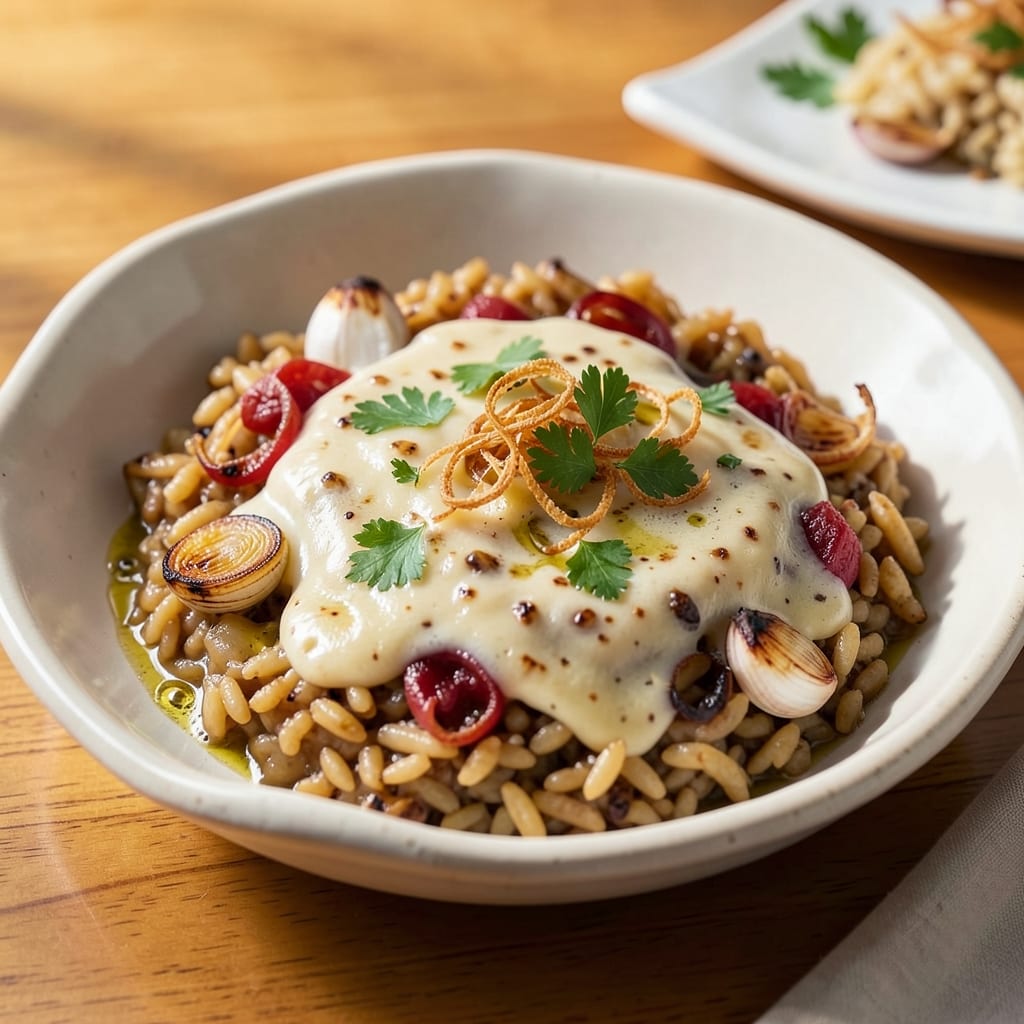
This Asiago rice recipe delivers the perfect balance of creamy richness and satisfying crunch, transforming simple grains into a restaurant-worthy side dish. The secret lies in a toasted parmesan crust that encases tender rice, creating a texture contrast that elevates every bite. I developed this method after testing countless variations, and the results consistently impress—even picky eaters ask for seconds.
The process is simpler than it sounds: start with perfectly toasted rice grains that develop a nutty depth, then blanket them in a velvety Asiago-parmesan mixture before baking until golden. What makes this recipe stand out is how the cheese melts into a creamy blanket while the rice maintains its individual grains, creating a dish that's both elegant and approachable. No fancy equipment required—just a few key techniques and quality ingredients.
By the time it emerges from the oven, you'll have a dish that's creamy yet not gluey, with a crispy golden crust that adds a satisfying crunch. The aroma alone will have everyone gathering around the table, and the first bite delivers that perfect combination of textures and flavors. This recipe works beautifully as a standalone dish or paired with roasted vegetables, grilled proteins, or even as a hearty appetizer.
One of the best features? It reheats beautifully, making it ideal for meal prep or leftovers. The Asiago cheese adds a subtle nutty sweetness that pairs wonderfully with savory dishes, while the parmesan provides a sharp, salty finish. Let's create this creamy, crunchy masterpiece that will become a regular on your dinner table.
Ingredients for asiago rice
Transform simple grains into a creamy, crunchy masterpiece with these quality ingredients.
| Ingredient | Amount | Notes |
|---|---|---|
| Arborio Rice 🍚 | 1 ½ cups | Uncooked, medium-grain preferred |
| Extra-Virgin Olive Oil 🫒 | ¼ cup | High-quality, fruity variety |
| Asiago Cheese 🧀 | 1 cup | Freshly grated, medium-sharp |
| Parmesan Cheese 🧀 | ½ cup | Freshly grated, aged minimum 24 months |
| Garlic Cloves 🧄 | 4 cloves | Minced, fresh preferred |
| Shallots 🧅 | 2 whole | Finely diced, 1 tbsp total |
| Chicken Broth 💧 | 1 ½ cups | Low-sodium, homemade preferred |
| Unsalted Butter 🧈 | 2 tbsp | Cold, cubed for toasting |
| Fresh Thyme Leaves 🌿 | ¼ cup | Chopped, stems removed |
| Salt 🧂 | 1 ½ tsp | Diamond Crystal kosher |
| Black Pepper 🌶️ | ½ tsp | Freshly cracked |
| Freshly Baked Breadcrumbs 🍞 | ¼ cup | Panko-style for extra crunch |
| White Wine 🍷 | ¼ cup | Dry, like Sauvignon Blanc |
The rice is the foundation, so grab Arborio—its high starch content creates that signature creamy texture. For the cheeses, Asiago brings nutty depth while aged Parmesan adds sharpness. Whole Foods or specialty cheese shops have the best grated options, but pre-shredded works in a pinch if you're in a hurry. The butter? Cold and cubed is key for toasting the rice properly—don't melt it first. Fresh thyme and shallots elevate the flavor without overpowering, so don't skip them even if they seem minor.
No Asiago? Gruyère or sharp white cheddar work as substitutes, though the flavor profile shifts slightly. Short on Parmesan? Pecorino Romano has a similar sharpness. The white wine adds brightness, but extra chicken broth works if you're avoiding alcohol. For the breadcrumbs, Panko gives the best texture, but regular breadcrumbs toasted in butter work too. If you're prepping ahead, toast the rice first and store it separately—just add the cheese mixture when ready to bake. The shallots and garlic can be pre-minced and refrigerated for up to 3 days.
This dish reheats like a dream—just pop it in the oven at 350°F for 10 minutes to restore that crispy crust. Store leftovers in an airtight container for up to 4 days, though I rarely have any left that long. For meal prep, divide the cheese mixture into small containers and keep the rice separate—just toss together when ready to bake. The toasted rice keeps its texture better when stored separately, so don't combine everything until serving time.
Why You'll Love This Recipe
- One-Pot Magic: I swear by this recipe when I’m too tired to wash pots—just saute the garlic in olive oil, toast the Arborio rice until it’s golden, add broth (or even water in a pinch), and let the Asiago and Parmesan melt into that creamy, al dente perfection. No straining, no fuss, just pure satisfaction.
- Cheesy Crispy Core: That moment when the rice has a crispy bottom layer but stays creamy inside? It’s like a hug in your mouth. The Asiago gives it a nutty, sharp bite, while the Parmesan adds that rich, umami depth—every bite is a little flavor explosion.
- Weeknight Workhorse: I make this for busy nights, potlucks, or even as a side for Sunday dinner. It reheats beautifully, so I’ll double the batch and freeze half for when I’m too wiped to cook. Honestly, it’s the kind of dish that makes you look like a hero without trying.
- Budget-Friendly Luxury: Arborio rice and good cheese aren’t cheap, but this recipe stretches them further than you’d think. A single batch feeds four, and the leftovers? Even better the next day—crispier edges, richer flavor. It’s comfort food that doesn’t break the bank.
Step-by-step instructions for creamy Parmesan crust with toasted grain crunch
Transform simple Arborio rice into a luxurious dish with a velvety Asiago-Parmesan crust and crispy breadcrumb topping.
Toast the Rice and Build Flavor Base
Heat the 0.25 cup extra-virgin olive oil and 2 tablespoons unsalted butter in a heavy-bottomed pot over medium-high heat. Add the 1.5 cups Arborio rice and stir constantly for 2-3 minutes until the grains turn translucent at the edges and release their nutty aroma. This toasting step is crucial—it develops the rice's natural starches and prevents mushy texture.
Add the 2 whole finely diced shallots and 4 cloves minced garlic, cooking for another 1-2 minutes until the shallots soften and the garlic releases its pungent fragrance. Here's the thing—don't let the garlic burn. Remove the pot from heat if it starts to darken too quickly. You want aromatic, not bitter.
Deglaze with Wine and Add Broth
Return the pot to medium heat and pour in the 0.25 cup white wine, scraping up any browned bits from the bottom. Let it simmer for 2-3 minutes until completely evaporated. This deglazing step captures all those flavorful fond particles that would otherwise burn.
Add 1 cup chicken broth to the pot and stir once to combine. Bring to a gentle simmer, then reduce heat to low. The rice should be partially submerged with about ¼ inch of liquid visible above. Cover the pot with a tight-fitting lid and let the rice cook undisturbed for 15 minutes. This initial cooking period allows the rice to absorb liquid while developing its signature creamy texture.
Cook the Rice to Al Dente Perfection
After 15 minutes, check the rice by lifting the lid slightly and testing a grain with your fork. It should be tender but still slightly firm to the bite—this is the al dente stage. Add another ½ cup chicken broth and stir gently to distribute. Cover again and cook for another 10-12 minutes, checking periodically.
Here's where it gets interesting: the rice should absorb the broth gradually, with just enough liquid remaining to create that signature creamy consistency. If it looks dry before reaching al dente, add 2-3 tablespoons more broth at a time. The goal is to end with rice that's perfectly tender with a slight bite, not mushy or undercooked.
Create the Creamy Cheese Crust
Once the rice is al dente, remove the pot from heat and let it sit uncovered for 2 minutes to allow any remaining steam to evaporate. Then stir in the 1 cup freshly grated Asiago cheese and 0.5 cup freshly grated Parmesan cheese until completely melted and evenly distributed. The cheese should create a luxurious, creamy coating around each grain.
Add the 0.25 cup chopped fresh thyme leaves, 1.5 teaspoons salt, and 0.5 teaspoon freshly cracked black pepper. Gently fold everything together until you have a homogeneous, creamy mixture. This is the moment that matters: the cheese should be fully melted and the rice should maintain its individual grains while being coated in that rich, velvety sauce.
Top with Crispy Breadcrumbs for Contrast
Spread the rice evenly onto a serving platter and sprinkle the 0.25 cup freshly baked breadcrumbs evenly over the top. For extra crunch, I like to press them down gently with the back of a spoon. Place the platter under a broiler for 2-3 minutes until the breadcrumbs turn golden brown and crispy.
Watch carefully—broilers can be unpredictable. You want the breadcrumbs to be toasted to a perfect golden color, not burnt. Once they're crispy, remove from the broiler and let the rice rest for 5 minutes before serving. This resting period allows the flavors to meld completely and the breadcrumbs to set properly, creating that perfect textural contrast between creamy rice and crispy topping.
Pro Tips For Making Asiago Rice
- TOAST THE GARLIC RIGHT: Sauté those garlic cloves in olive oil until they’re just golden—not brown, not burnt, but that sweet, nutty stage where they smell like a garlic festival. Skip this, and your rice will taste like someone microwaved raw garlic. (Yes, I’ve done it. Don’t.)
- STIR LIKE YOU MEAN IT: Arborio rice needs constant, aggressive stirring—think windmill, not gentle swirls. The goal is to coat every grain in that cheesy, garlicky oil so they absorb flavor and moisture. I used to stir lazily and ended up with dry, separate grains. Now? No regrets.
- GRATE THE CHEESE FINE: Asiago and Parmesan lose their magic if they’re clumpy. Use a microplane or the smallest holes on a box grater—you want powdery, not pebbly. I once threw in pre-shredded cheese (shame on me) and got a sad, oily mess. Now I grate it fresh, even if it takes 10 minutes.
- LET IT REST (YES, REALLY): Dumping hot rice into bowls and mixing in cheese? Big mistake. Spread the rice on a tray, let it cool for 5 minutes, then fold in the grated cheeses. This keeps it creamy, not gloppy. I learned this after serving a dish that looked like a cheese volcano exploded. (Your guests won’t notice the difference, but you will.)
Common mistakes when making this dish
Overcooking the Rice
This is the most common mistake I see—and it ruins everything. Arborio rice needs delicate handling, so avoid stirring it constantly while cooking. Every time you lift the lid or stir, you release steam, which can turn your creamy rice into a gluey mess. Instead, let it cook undisturbed for 15 minutes after the initial broth addition, then add more broth gradually. The goal is al dente texture, not mushy grains. 🌡️
Pro tip: If your rice looks dry before it's fully cooked, add 2-3 tablespoons of broth at a time rather than all at once. Stirring too much or adding too much liquid too quickly will break down the starches and turn your dish into a sad, watery pile. Trust the process—Arborio rice knows what it needs!
Skipping the Toasting Step
That nutty aroma you smell when toasting the rice? That's not just for show—it's the foundation of flavor. Skipping this 2-3 minute toasting step with olive oil and butter means you'll miss out on developing the rice's natural starches, which create that signature creamy texture later. I've made this mistake myself, and the results were disappointingly bland. Toast the rice until it's translucent at the edges, but don't let it brown—just aromatic and slightly crisp.
For extra flavor, I like to add a pinch of salt during toasting. This enhances the rice's ability to absorb liquid later, creating a more cohesive final texture. If your rice tastes flat, you probably skipped this crucial step.
Using Pre-Shredded Cheese
This is a game-changer: never use pre-shredded cheese for this recipe. Those anti-caking agents turn the cheese into a paste when melted, creating a grainy, unappetizing texture. Freshly grated Asiago and Parmesan are worth the effort—they melt smoothly and create that luxurious, velvety coating around each grain. Invest in a good microplane or ask your cheese shop to grate it fresh for you. Your taste buds will thank you!
If you're in a pinch, the closest substitute is block cheese that you grate yourself. Pre-shredded cheese will work in a bind, but the texture will suffer. For the best results, always grate your own cheese—it makes all the difference in this creamy dish.
Neglecting the Broth Temperature
Cold broth is the enemy of perfect rice. Always use broth that's at least room temperature when adding it to your rice. Cold liquid shocks the rice and creates uneven cooking, leading to some grains being undercooked while others become mushy. I like to heat my broth in a separate pot until it's warm but not boiling before adding it to the rice. This gradual temperature approach ensures even cooking throughout.
Another common mistake? Adding broth too quickly. Pour it in slowly, allowing the rice to absorb it gradually. This method gives you more control over the final texture and prevents the dreaded mushy rice syndrome.
Burning the Garlic
Garlic is delicate—it can go from aromatic to bitter in seconds. When sautéing those 4 cloves of minced garlic, keep a close eye on them. They should just be fragrant and softened, not darkened or crispy. If you see the garlic turning brown, remove the pot from heat immediately. Burnt garlic will make your entire dish taste off, no matter how good the rest of the ingredients are. 🧄
For extra insurance, I like to add the garlic just before the wine deglazing step. This way, it gets a quick flavor boost from the wine and then cooks gently in the broth. Fresh garlic is non-negotiable here—jarred or pre-minced won't give you the same flavor impact.
Broiling Too Long
The breadcrumb topping is all about that perfect golden crunch, but it's easy to overdo it. Watch your broiler closely—those 2-3 minutes can turn into 5 minutes if you're not paying attention. Burnt breadcrumbs mean burnt flavor, and that's a fast track to disappointment. The moment they turn golden brown, remove them immediately. Let the rice rest for 5 minutes before serving—this helps the breadcrumbs set properly and creates that satisfying crunch.
For even browning, I like to rotate the platter halfway through broiling. This ensures the breadcrumbs toast evenly without burning in spots. A quick test: tap the breadcrumbs with your finger—they should sound crisp, not hollow. If they sound dull, they need more time. If they sound too loud, they're burnt.
Nutrition facts
Frequently asked questions
Can I make this Asiago rice dish in a rice cooker?
Yes, but with adjustments! Use the same toasting step in a pot first, then transfer the rice to your cooker with the wine and initial broth. After 15 minutes, add more broth gradually (about ¼ cup at a time) until the rice reaches al dente. The key difference is you'll need to stir occasionally to prevent sticking. For the cheese topping, transfer to an oven-safe dish and broil as directed. The texture will be slightly different but still delicious!
What's the best way to store leftovers?
Store the cooked rice (without breadcrumbs) in an airtight container for up to 4 days in the fridge. To reheat, cover with foil and warm at 350°F for 10 minutes, then add fresh breadcrumbs and broil for 2 minutes to restore the crispy topping. For freezing, toast the rice first, store separately from the cheese mixture, and combine when ready to bake. The texture holds up better this way!
Can I substitute Arborio rice with another type?
While Arborio is ideal for its creamy texture, you can use Carnaroli or Vialone Nano for similar results. For long-grain rice like basmati, the texture will be firmer and less creamy. Short-grain rice like sushi rice will become too sticky. If substituting, reduce broth by 25% since these varieties absorb liquid differently. The flavor will still be delicious, just with different mouthfeel!
How can I make this dish vegetarian?
Easy! Simply replace the chicken broth with vegetable broth and add 1 teaspoon nutritional yeast when mixing the cheese for extra umami. For extra protein, stir in ½ cup cooked white beans with the cheese mixture. The dish maintains its creamy texture while becoming completely plant-based. The nutty Asiago pairs beautifully with vegetable flavors!
Why does my rice turn out mushy?
This usually happens from one of three things: over-stirring (which breaks down starches), adding too much liquid at once, or using cold broth. For perfect texture, stir only when absolutely necessary, add broth gradually, and always use warm (not cold) broth. The rice should be al dente with just a slight bite—like pasta. If it's mushy, you've likely overcooked it by stirring too much or letting it sit too long off heat.