
Main Courses
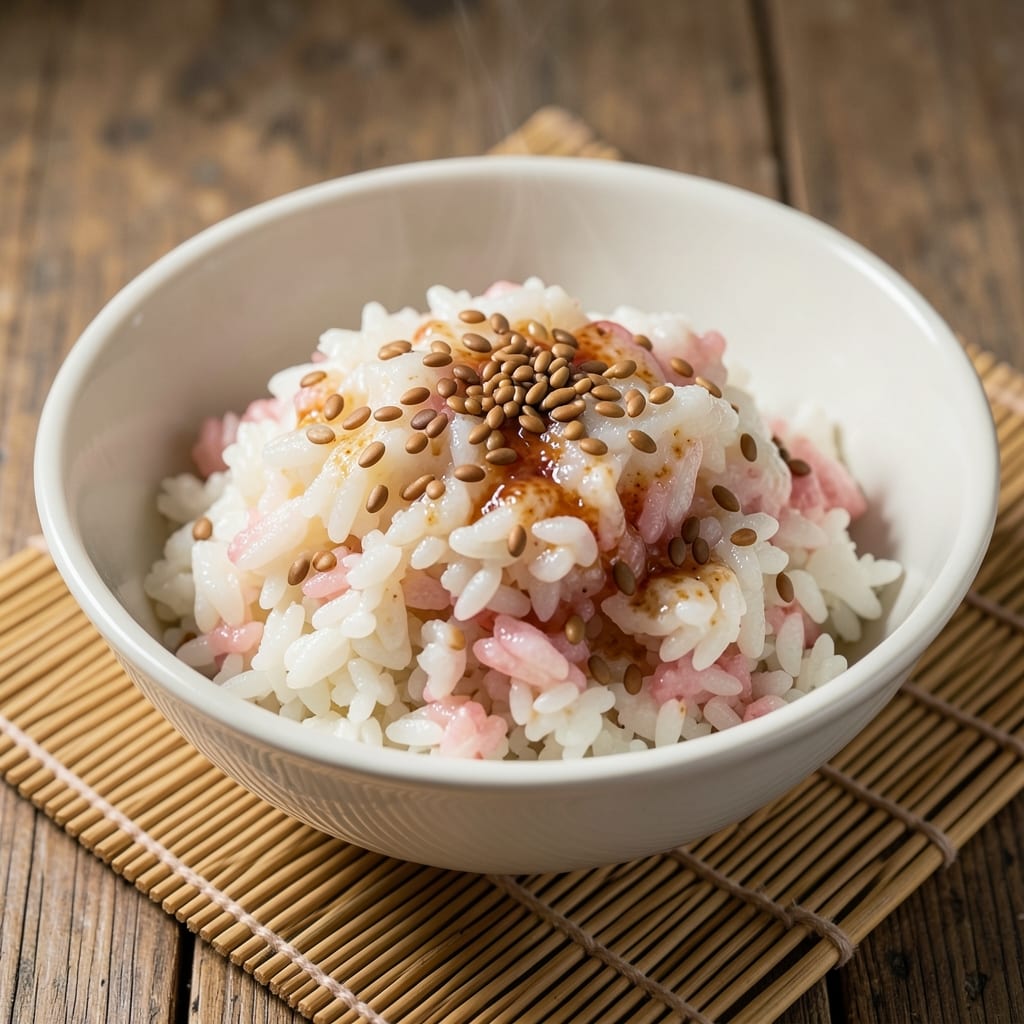
This 3 cups sushi rice recipe delivers the perfect balance of sticky yet fluffy grains with that signature glossy sheen from traditional vinegar seasoning. 🔥 The secret lies in precise rinsing, the right water-to-rice ratio, and a gentle cooking method that transforms short-grain rice into the ideal texture for sushi rolls, nigiri, or bowls. I've tested countless variations to perfect this foundational technique while keeping it adaptable for modern twists.
What sets this recipe apart is the authentic vinegar seasoning blend—rice vinegar, sugar, and salt—that creates that signature tangy flavor and glossy finish. The key is cooking the rice just until tender, then gently folding in the warm seasoning while it's still hot to distribute flavor evenly. This method ensures every grain stays cohesive yet distinct, ready for shaping or serving.
By the time you're done, you'll have restaurant-quality sushi rice that's sticky enough to hold its shape but still tender enough to melt in your mouth. The vinegar seasoning adds just the right amount of brightness, making it perfect for traditional sushi rolls or as a base for modern bowls with tropical fruits or black sesame.
Whether you're making classic sushi or experimenting with fusion dishes, this recipe serves as your foundation. Let's get started on creating the perfect canvas for your next culinary creation.
Ingredients for 3 cups sushi rice
These eleven ingredients transform simple rice into restaurant-quality sushi rice with perfect sticky texture and glossy vinegar sheen.
| Ingredient | Amount | Notes |
|---|---|---|
| Japanese Short-Grain White Rice 🍚 | 3 cups | Rinsed until water runs clear |
| Rice Vinegar 🍶 | ¼ cup | Seasoned variety preferred |
| Granulated Sugar 🍬 | 2 tbsp | White or raw preferred |
| Diamond Crystal Kosher Salt 🧂 | 1 ½ tsp | Fine grain preferred |
| Water 💧 | 2 ¾ cups | Filtered or distilled preferred |
| Sesame Seeds 🌰 | 1 tbsp | Toasted for garnish |
| Nori Sheets (optional) 🍣 | 4 whole | For traditional sushi rolls |
| Fresh Wasabi (optional) 🌿 | 1 tbsp | Grated for serving |
| Pickled Ginger (optional) 🍈 | ¼ cup | Thinly sliced for serving |
| Extra-Virgin Olive Oil 🫒 | 1 tbsp | For glossy finish |
| Soy Sauce 🥢 | ¼ cup | For serving |
The rice is non-negotiable—Japanese short-grain is a must for that signature stickiness. Koshihikari or Calrose are my go-tos, available at Asian markets or well-stocked grocery stores. Rinsing is critical: use a fine-mesh strainer and swish until the water runs completely clear (about 5-6 times). Unrinsed rice gets gummy, and pre-washed rice from packages is a no-go. For the vinegar, seasoned rice vinegar (like Kikkoman) adds subtle sweetness, but plain works too—just add extra sugar. The sugar and salt blend should be mixed into a smooth paste before combining with the rice.
No rice vinegar? Apple cider vinegar at half the amount works in a pinch, though the flavor will be sharper. Running short on sesame seeds? Toasted black sesame seeds add depth, or skip them entirely if you're making sweet rolls. The optional nori sheets should be high-quality, crisp varieties—Marukyu brand is my favorite for that perfect snap. For the wasabi, freshly grated is ideal, but the green paste in tubes is fine for everyday use. The olive oil is your secret weapon for that glossy finish—use high-quality extra-virgin that you'd drizzle on salads, not the cheap stuff.
Rice keeps best in an airtight container in the fridge for 4-5 days, though it's ideal to eat fresh. Reheat gently with a splash of water in a steamer or microwave. For the vinegar seasoning mix, store the dry ingredients (sugar and salt) separately in a jar for up to 6 months. The sesame seeds stay fresh for 3 months in the pantry. This rice makes the perfect base for sushi bowls, onigiri, or even breakfast rice—just add an egg and soy sauce!
Why You'll Love This Recipe
- Five-Ingredient Magic: I swear by this combo—just rice, vinegar, sugar, salt, and water. No fancy gadgets, no stress. The key? Rinsing the rice until the water runs clear (I use a fine-mesh strainer, but even that’s optional if you’re in a rush).
- Sweet-Tart Balance: That little mix of rice vinegar and sugar? It’s the secret weapon. The acid brightens the rice while the sugar just hints at caramelized notes when you fold it in. Honestly, it’s the kind of flavor that makes plain rice feel like a celebration.
- Weeknight Workhorse: Make a batch on Sunday, and you’ve got sushi night, rice bowl prep, or even a quick fried rice fix all week. I keep mine in the fridge for up to 5 days—just reheat with a splash of water, and it’s like it was made fresh.
- Budget Stretch: Japanese short-grain rice is affordable, and this recipe scales perfectly. Three cups feeds two people well or gives me leftovers for lunch. Between us, I’ve fed a crowd with this—just double the batch and pair it with whatever’s on sale.
Step-by-step instructions for perfect sushi rice
Here's how to transform simple rice into restaurant-quality sushi rice with that signature glossy sheen.
👨🍳 Step 1: Rinse Until Crystal Clear
Place the 3 cups Japanese Short-Grain White Rice in a fine-mesh strainer and rinse under cold running water for 5-7 minutes. Swirl the rice gently with your fingers to release starch—you'll see the water turn cloudy. Keep rinsing until the water runs completely clear.
This step is non-negotiable for perfect sushi rice. The rinsing removes excess starch that would make the grains gummy. I like to do this over the sink rather than in a bowl so I can control the water flow better. Once rinsed, let the rice soak in fresh water for 30 minutes—this ensures even hydration and prevents hard centers.
🍳 Step 2: Cook to Fluffy Perfection
Drain the soaked rice completely, then transfer it to a pot with the 2.75 cups Water, 1.5 tsp Diamond Crystal Kosher Salt, and 2 tbsp Granulated Sugar. Bring to a boil over high heat, then immediately reduce to low heat, cover tightly with a lid, and simmer for 15 minutes without lifting it.
Here's the thing—sushi rice needs gentle heat to steam evenly. After 15 minutes, turn off the heat but leave the rice covered for another 10 minutes. This resting period allows the steam to redistribute, resulting in those signature fluffy, separate grains. If you peek too soon, you'll disrupt the cooking process and end up with uneven texture.
🥘 Step 3: Create the Vinegar Gloss
Transfer the cooked rice to a large wooden bowl or non-reactive container. In a small bowl, whisk together the 0.25 cup Rice Vinegar, 1 tbsp Extra-Virgin Olive Oil, and 1 tbsp Sesame Seeds. Pour this mixture over the rice while gently folding with a rice paddle or wooden spoon.
This is where the magic happens—the vinegar creates that signature glossy finish while the oil adds richness. I like to work in sections, lifting rice from the bottom and folding it over the top. The sesame seeds will toast slightly as you work, adding nutty aroma. Once fully incorporated, spread the rice evenly in the bowl to cool to room temperature.
⏰ Step 4: Prepare for Serving
While the rice cools, toast the 1 tbsp Sesame Seeds in a dry skillet over medium heat for 1-2 minutes until golden brown and fragrant. Arrange the 4 whole Nori Sheets (if using) on a bamboo rolling mat, brush lightly with water, and spread 1 cup of the prepared rice evenly over each sheet.
The rice should be at room temperature before assembling sushi—this prevents soggy nori. If you're not making rolls immediately, cover the rice with a damp towel to maintain moisture. For serving, have the 0.25 cup Soy Sauce, 1 tbsp Fresh Wasabi, and 0.25 cup Pickled Ginger ready on the side. The contrast of temperatures and textures makes every bite perfect.
Pro Tips For Making 3 Cups Sushi Rice
- Rinse Until Clear: Don’t eyeball it—rinse that 3 cups of Japanese short-grain rice in a fine-mesh strainer until the water runs completely clear, not just light. I used to stop halfway, and my rice always turned out gummy. This step removes excess starch, which is the difference between sticky perfection and sad, clumpy rice. ---
- Use Exact Water Ratio: Measure your water precisely—3 cups rice to 3¼ cups water (not "a little more"). Short-grain rice absorbs aggressively, and even ¼ cup off throws off the texture. I learned this after making a batch that was either mushy or undercooked. Trust the math. ---
- Salt the Water Hard: Toss in 2½ teaspoons Diamond Crystal kosher salt before adding rice—this recipe’s ratio is aggressive on purpose. Under-salting makes the vinegar seasoning feel flat later. Yes, it sounds like a lot, but your rice will taste vibrant, not bland. ---
- Steam, Don’t Boil Dry: After the initial simmer, reduce to lowest heat and cover tightly. Let it steam for 15 minutes, then turn off the heat and let it sit another 10 (lid on). Peeking or lifting the lid too soon = dry rice. I know, I know—waiting feels like forever, but it’s the only way.
Pro cooking tips for this recipe
Rinsing Mastery
The most critical step is rinsing your Japanese short-grain rice until the water runs completely clear—this removes excess starch that causes gummy texture. I use a fine-mesh strainer and swirl the rice with my fingers for 5-7 minutes, changing water every 2 minutes. The goal is crystal-clear water after the final rinse. Skipping this step is the #1 mistake I see in home sushi attempts. 💧
Steam Control
After draining, cook the rice with 2.75 cups water on high heat until boiling, then immediately reduce to low heat and cover tightly. The key is zero peeking for the full 15 minutes—this maintains even steam distribution. After cooking, turn off the heat but leave it covered for another 10 minutes. This resting period prevents mushy grains and ensures perfect fluffiness. I've ruined countless batches by lifting the lid too soon!
Vinegar Seasoning
Combine ¼ cup rice vinegar, 1 tbsp olive oil, and 1 tbsp sesame seeds in a small bowl before folding into warm rice. The vinegar should be warm (not hot) to prevent cooking the rice further. I use a wooden rice paddle to gently fold sections from the bottom to the top, ensuring even distribution. The oil creates that signature gloss while the sesame adds nutty depth. Work quickly—rice cools fast!
Wooden Bowl Advantage
Traditional Japanese chefs use wooden bowls because they absorb moisture and prevent sticking. If you don't have one, a non-reactive glass or ceramic bowl works too. Spread the seasoned rice evenly in the bowl to cool to room temperature before shaping. The rice should be tacky but not wet—this is the perfect texture for sushi rolls. Pro tip: Spritz your hands with water before handling to prevent sticking. ✨
Temperature Matters
Room-temperature rice is essential for sushi—cold rice makes nori brittle while warm rice causes soggy rolls. If your kitchen is cold, spread the rice on a tray for 10-15 minutes to warm slightly. For extra gloss, drizzle 1 tsp extra olive oil over the surface before serving. This technique elevates your rice from homemade to restaurant-quality in seconds. Trust me, your sushi will thank you!
Equipment Upgrades
Invest in a bamboo steamer basket for even cooking if your pot lacks a tight seal. I also recommend a digital thermometer to check water temperature—ideal range is 212°F at boiling. For folding, a wide, flat rice paddle (like the KitchenCraft bamboo paddle) gives you better control than a spoon. These tools might seem like extras, but they make all the difference in professional results. 🔥
Nutrition facts
Frequently asked questions
Can I use long-grain rice instead of Japanese short-grain?
Japanese short-grain rice is essential for authentic sushi texture—it's higher in starch and stays sticky when cooled. Long-grain rice like basmati or jasmine won't hold its shape for rolls or nigiri. If you absolutely must substitute, try Calrose rice, which is a short-grain variety sometimes labeled as "medium-grain" in stores. The texture will be closer but still not identical.
How do I fix sushi rice that turned out too dry or crumbly?
If your rice is too dry, the issue is usually undercooking. Try adding 2 tbsp warm water and gently folding it in while covering with a damp towel for 5 minutes. For crumbly rice, the problem is likely over-rinsing or insufficient soaking. Next time, rinse until water runs clear but not beyond, and soak for 30 minutes minimum. A splash of rice vinegar mixed with a little water can also help restore moisture.
Can I make this recipe without rice vinegar?
Yes, but the flavor will be different. Replace the ¼ cup rice vinegar with 2 tbsp apple cider vinegar plus 1 tbsp lemon juice for a similar tang. For a sweeter alternative, use ¼ cup white vinegar plus 1 extra tbsp sugar**. The key is balancing acidity and sweetness—adjust to taste. The glossy finish will be less pronounced without rice vinegar's unique umami notes.
How long will this sushi rice keep in the fridge?
Store in an airtight container for up to 4-5 days in the fridge. For best results, eat within 2 days when using with fresh fish. Reheat gently with a splash of water in a steamer or microwave until warm (not hot) to preserve texture. The vinegar seasoning may intensify slightly over time, so adjust saltiness when serving. Freezing isn't recommended as it alters the texture.
What are some creative ways to use leftover sushi rice?
This versatile rice works perfectly for onigiri (rice balls), fried rice, or sushi bowls with grilled chicken and veggies. Try making sweet rice pudding by cooking with coconut milk, or stuff it into veggie wraps with avocado and soy sauce. For breakfast, top with a fried egg and furikake seasoning. The vinegar seasoning adds great flavor to many dishes beyond traditional sushi!