
Main Courses
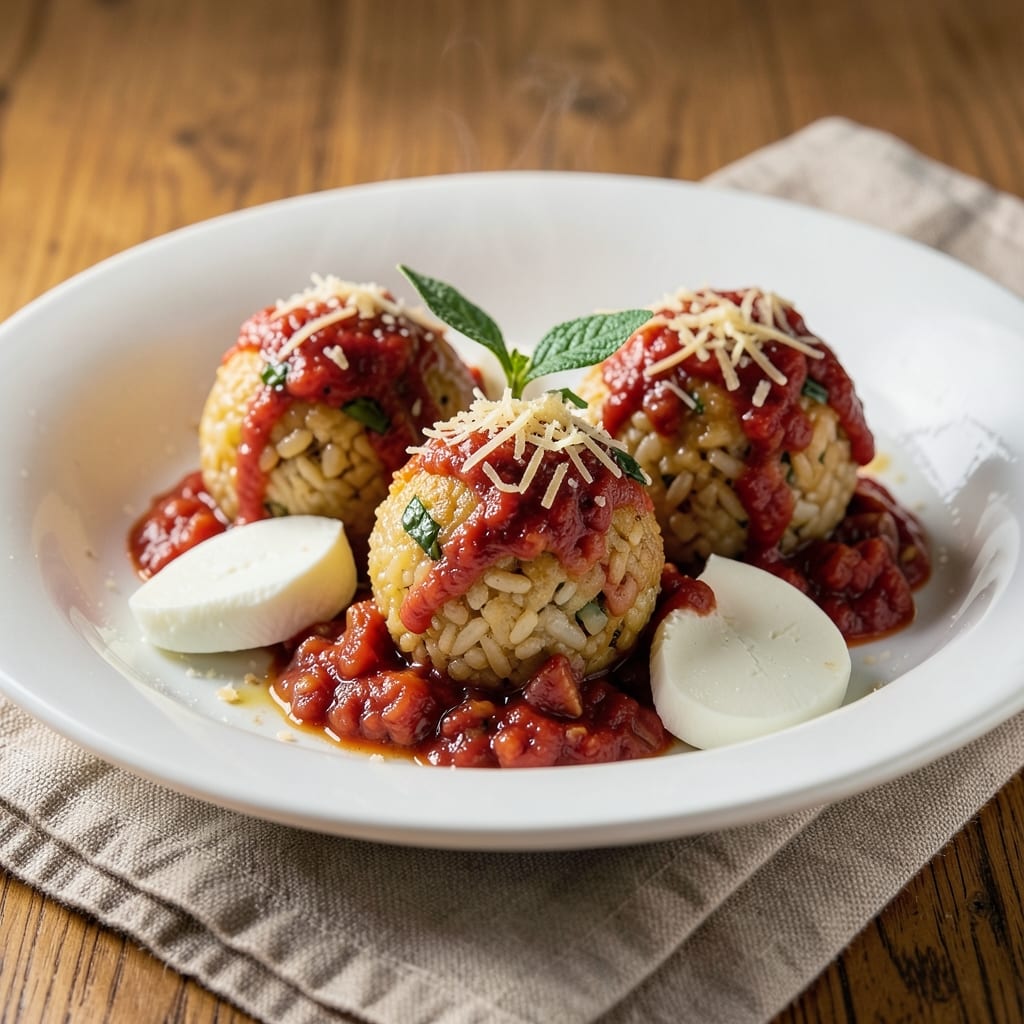
This arborio rice balls recipe transforms simple risotto into golden, crispy delights with a creamy core that melts in your mouth. The secret lies in perfectly cooked arborio rice—sticky yet firm enough to hold its shape—coated in a light, crispy breading that gives way to rich, savory fillings. I've perfected this technique over years of testing, ensuring every bite delivers that satisfying contrast between crunchy exterior and tender interior.
The magic starts with properly cooked arborio rice—it must be al dente but still hold together when shaped into balls. Traditional fillings like ragù, mozzarella, and peas create a classic Italian flavor, but you can customize with whatever you love. The breading technique is crucial: a light dusting of flour followed by a crispy panko coating ensures that perfect golden crust without becoming soggy.
What makes these rice balls exceptional is their ability to be made ahead and fried to order, keeping the interior warm and the crust perfectly crisp. Serve them as an appetizer, side dish, or even a hearty main course with a simple salad. The aroma alone will draw everyone to the table, and the first bite delivers that perfect balance of textures and flavors.
Once you master this technique, you'll never buy frozen arancini again. The process is straightforward but requires attention to detail—especially when shaping the balls and maintaining an even temperature during frying. With practice, you'll achieve restaurant-quality results that taste even better than your favorite Italian trattoria.
Ingredients for arborio rice balls
Perfectly cooked arborio rice, crispy panko, and creamy Italian fillings—here's what you need for golden arancini magic.
| Ingredient | Amount | Notes |
|---|---|---|
| Arborio Rice 🍚 | 1 ½ cups | Uncooked, high-quality variety |
| Vegetable Broth 💧 | 3 cups | Low-sodium preferred |
| Parmesan Cheese 🧀 | ½ cup | Freshly grated from block |
| Butter 🧈 | 2 tbsp | Unsalted, for cooking rice |
| Ragù Sauce 🍅 | 1 cup | Homemade or quality jarred |
| Mozzarella Cheese 🧀 | ½ cup | Fresh, low-moisture preferred |
| Frozen Peas 🌿 | ¼ cup | Thawed before mixing |
| All-Purpose Flour 🌾 | ½ cup | For dusting rice balls |
| Japanese Panko Breadcrumbs 🍞 | 1 ½ cups | Light and crispy |
| Large Eggs 🥚 | 1 whole | Beaten for dipping |
| Vegetable Oil 🫒 | 2 cups | For frying, high smoke point |
| Salt 🧂 | 1 tsp | Kosher or sea salt |
| Black Pepper 🌶️ | ½ tsp | Freshly ground preferred |
| Garlic Cloves 🧄 | 2 cloves | Minced for ragù |
Arborio rice is non-negotiable here—it needs that high starch content for that perfect al dente texture. Lundberg or Barilla are my go-tos, but any quality arborio works. The vegetable broth should be simmering hot when you add the rice—never boiling, or it'll turn mushy. For the Parmesan, grate it yourself—pre-shredded has anti-caking agents that ruin the texture. If you're making a big batch, freeze the cooked rice balls (unfried) on a tray first—they won't stick together when you transfer to bags.
No panko? Regular breadcrumbs toasted in a dry pan work in a pinch, but they won't be as crispy. Fresh mozzarella is ideal, but low-moisture shredded from a block saves time. Short on ragù? Mushroom duxelles or spinach and ricotta make great alternatives. The peas can be swapped for diced carrots or zucchini if you're not a fan. For the oil, vegetable or canola is perfect—avoid olive oil, which burns too easily. Keep your frying thermometer at 350°F for that golden crust.
Cooked rice balls keep 2 days in the fridge, but they're best fried fresh. For make-ahead prep, shape the balls and refrigerate them (uncoated) on a tray for up to 24 hours—they'll hold their shape perfectly. Fried arancini reheat beautifully in the oven at 375°F for 5-10 minutes. I always make double batches—they disappear faster than you can say 'second round!' Store leftovers in an airtight container, but honestly, they're best eaten the same day.
Why You'll Love This Recipe
- No-Fuss Assembly: I swear by this—just toast the rice, mix in butter and broth, shape into balls, and bake. No fussy risotto steps, no constant stirring. My kids "help" by pressing the dough (and sometimes eating it raw), but the result? Still foolproof.
- Umami Bomb: That ragù tucked inside with melted Parmesan? It’s the kind of flavor that makes you pause mid-bite. The crispy exterior hides a creamy, saucy center—like a hug for your taste buds. (Honestly, I’ve made it vegetarian and meaty, and both versions disappear.)
- Weeknight to Party: Same recipe, different vibes. Weeknights? Serve with a simple salad. Guests over? Add a sprinkle of extra Parmesan and call it "fancy." I’ve even frozen them for game day—just reheat and serve. Zero stress, all reward.
- Budget Stretch: Arborio rice and Parmesan might sound fancy, but this recipe stretches them into way more servings than a full risotto. Leftovers? Toss them in a pan for fried rice or freeze for later. My wallet (and my family) thank me every time.
Step-by-step instructions for crispy arborio rice balls
Here's how to make these irresistible rice balls with a perfect balance of crispy crust and creamy filling.
Cook the Arborio Rice to Al Dente Perfection
In a medium saucepan, combine the 1.5 cups Arborio Rice with the 3 cups Vegetable Broth and 2 tbsp Butter. Bring to a boil over medium-high heat, then immediately reduce to a simmer. Cover and cook for 12 minutes without peeking—this steaming time is crucial for even cooking.
After 12 minutes, uncover and cook for another 8-10 minutes until all the liquid has been absorbed and the rice is al dente with a slight bite. You'll know it's ready when the bottom of the pan develops a light crust and the rice pulls away from the sides. Remove from heat and let it sit covered for 5 minutes to steam through completely.
Mix in Filling Ingredients for Creamy Texture
While the rice steams, thaw the 0.25 cup Frozen Peas by placing them in a bowl of warm water for 5 minutes. Drain well. In a separate bowl, combine the cooked rice with the 1 cup Ragù Sauce, 0.5 cup Mozzarella Cheese, 0.5 cup Parmesan Cheese, 1 tsp Salt, and 0.5 tsp Black Pepper. Gently fold everything together with a spatula until fully incorporated.
Add the thawed peas and mix just until evenly distributed. The mixture should be moist but packable—if it's too dry, add 1-2 teaspoons of the reserved cooking liquid. This step is where the magic happens: the cheeses melt slightly from the residual heat, creating that signature creamy center we're after.
Shape and Prepare the Rice Balls
Transfer the rice mixture to a clean work surface lightly dusted with 0.5 cup All-Purpose Flour. Divide into 4 equal portions (about ½ cup each) and shape into balls by rolling between your palms. I press down gently on each ball to create a flat base—this prevents them from rolling away when you transfer them to the breading station.
Place the shaped rice balls on a plate and let them sit for 10 minutes at room temperature. This brief rest prevents them from falling apart during breading. While they rest, prepare your breading station: beat the 1 whole Large Eggs in a shallow bowl and place the 1.5 cups Japanese Panko Breadcrumbs in another shallow bowl.
Create the Perfect Crispy Crust
Heat 2 cups Vegetable Oil in a deep skillet or Dutch oven to 350°F—use a thermometer to ensure accuracy. Dip each rice ball first into the beaten egg, letting any excess drip off, then roll it thoroughly in the panko breadcrumbs, pressing gently to adhere. Place the coated balls on a wire rack to rest for 5 minutes while the oil comes to temperature.
Carefully add the breaded rice balls to the hot oil in batches (don't overcrowd) and fry for 3-4 minutes per side until deep golden brown and crispy. The oil should sizzle gently—if it's too hot, the crust will burn before the center cooks. Transfer to paper towels to drain excess oil while you fry the remaining balls.
Serve Immediately for Maximum Enjoyment
Let the fried rice balls rest for 2 minutes before serving—this brief pause lets the crispy crust set while keeping the creamy interior warm. Serve them immediately while the crust is still crunchy and the cheese is gooey inside. The contrast between the crispy exterior and creamy filling is what makes these rice balls so irresistible.
For an extra touch, sprinkle with freshly cracked black pepper right before serving. These rice balls are perfect as an appetizer, snack, or even a main course when served with a simple salad. The key to success is keeping everything hot and serving promptly—they lose their crispiness quickly once removed from the oil.
Pro Tips For Making Arborio Rice Balls
- TOAST THE RICE FIRST: Heat the dry Arborio rice in a dry pan over medium-low for 2-3 minutes before adding broth—this removes the raw starch smell and gives your rice balls a deeper, nuttier base. I learned this the hard way when my first batch tasted flat, no matter how much Parmesan I added.
- USE COLD BROTH: Start with ice-cold vegetable broth instead of room temperature—it cooks the rice more evenly and prevents mushiness. Sounds counterintuitive, but it’s the thing that actually changes the outcome, especially when you’re layering in ragù later.
- PRESS HARDER THAN YOU THINK: When shaping the rice balls, press them firmly with your hands until they hold shape—no half-hearted squeezing. If they crumble when you add them to the ragù, you’ll regret it later. (Yes, even if your hands get tired.)
- SALT THE PARMESAN: Grate the Parmesan yourself and mix it with a pinch of salt before folding it into the rice—store-bought shavings are often bland, and this step makes a real difference in flavor. I skip this when I’m lazy, but the dish is noticeably better when I don’t.
Creative variations of arborio rice balls
Classic Ragù & Cheese
The traditional filling of ragù sauce, mozzarella, and peas creates that signature Sicilian flavor you crave. I always use homemade ragù for depth, but a quality jarred version like Rao's works in a pinch. For extra richness, fold in 1 tbsp tomato paste with the ragù to intensify the umami. 🧀
Spinach & Ricotta
Swap the ragù for 1 cup ricotta cheese mixed with 1 cup chopped spinach (sautéed until wilted) and ¼ cup grated Pecorino Romano. This lighter filling keeps the rice balls tender while adding a bright, herby contrast. Add ½ tsp nutmeg for warmth—it's a classic Italian pairing. 🌿
Mushroom & Parmesan
Sauté 1 cup finely chopped mushrooms with 1 minced garlic clove and 1 tbsp olive oil until golden, then mix into your rice. Add ¼ cup grated Parmesan and ½ tsp dried thyme for an earthy, umami-packed variation. This works beautifully with a white wine reduction drizzle. 🍄
Spicy Chorizo & Cheese
For a bold twist, crumble ½ cup Mexican chorizo (cooked until crispy) into your rice mixture along with ½ cup shredded Monterey Jack. Add ½ tsp smoked paprika and ¼ tsp cayenne for heat. The chorizo adds smoky depth that pairs perfectly with the crispy crust. 🌶️
Sweet Tomato & Basil
Blend 1 cup canned San Marzano tomatoes with ¼ cup fresh basil, 1 tsp sugar, and ½ tsp red pepper flakes into a smooth sauce. Mix into your rice with ¼ cup feta cheese for a bright, summery variation. Garnish with extra basil leaves before serving. 🍅
Make-Ahead Filling Tips
All fillings can be prepped 1 day ahead and stored in airtight containers in the fridge. Reheat gently in a saucepan with 1 tbsp broth to maintain moisture. For extra flavor, add 1 tsp pasta water when reheating—it helps bind everything together beautifully. 💡
Nutrition facts
Frequently asked questions about arborio rice balls
Why does my arborio rice turn mushy when making rice balls?
The most common mistake is using too much liquid or boiling the rice instead of simmering it. Always bring the broth to a simmer first, then add the rice. After the initial 12 minutes of covered cooking, uncover and let it dry out slightly on the bottom—this creates that perfect al dente texture. If your rice is too wet, spread it on a tray and bake at 300°F for 10 minutes to dry it out before shaping.
Can I bake these rice balls instead of frying?
Yes! For a lighter version, brush the breaded balls with olive oil and bake at 400°F for 20-25 minutes until golden. The texture will be less crispy but still delicious. For extra crunch, broil for the last 2 minutes. Just note that baked versions won't have that signature fried crunch, but they're a great make-ahead option.
How do I keep the rice balls from falling apart when shaping?
Work quickly with cool rice (let it sit 5 minutes after cooking) and keep your hands slightly wet or use a bit of flour on your palms. The rice should be moist but not sticky—if it's too wet, add 1-2 tablespoons of flour while mixing. Press gently when shaping to create a firm base that won't crumble during breading.
What's the best way to reheat leftover fried rice balls?
For best results, reheat in a 375°F oven for 5-8 minutes on a wire rack (not a plate) to maintain crispiness. If using the air fryer, cook at 350°F for 3-4 minutes until heated through. Microwaving will make them soggy—avoid it if you want that perfect texture contrast.
Can I make these rice balls without panko?
Toast 1.5 cups regular breadcrumbs in a dry pan for 3-5 minutes until golden, then use them instead. For extra crunch, mix with ¼ cup crushed cornflakes. The texture won't be quite as light, but it still works well. If you're gluten-free, use gluten-free breadcrumbs and fry at a slightly lower temperature (325°F) to prevent burning.