
Main Courses
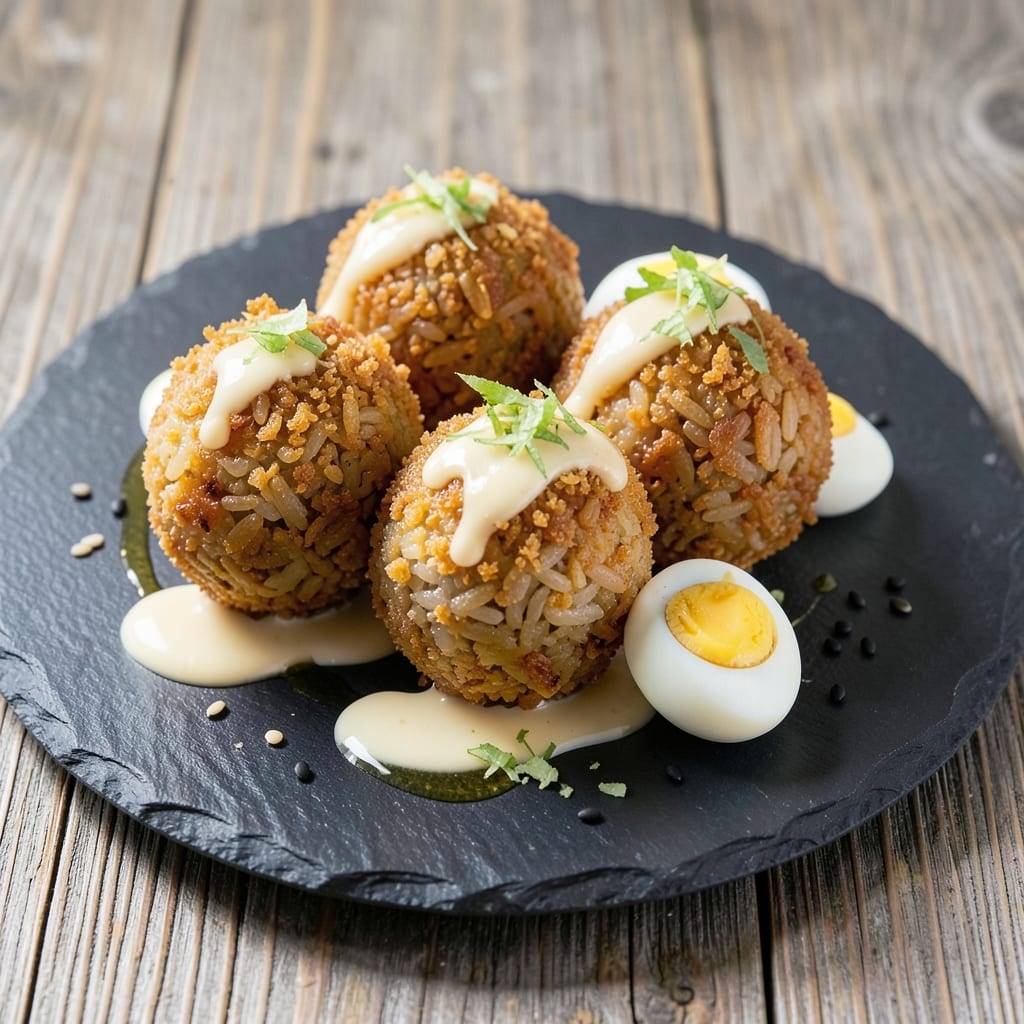
This Asian fried rice balls recipe delivers the perfect balance of crispy exteriors and umami-rich centers—ideal for appetizers, snacks, or even a light meal. The secret lies in shaping perfectly cooked rice into bite-sized balls, wrapping them in a thin layer of egg or batter, and frying until golden. Whether you're making traditional onigiri-inspired bites or Korean-style gamja jeon, the result is always satisfyingly crunchy with a tender, flavorful interior.
The beauty of this recipe is its versatility—you can customize the fillings with anything from pickled plum, salmon, or veggies to your favorite seasoned meat. The key to achieving that signature crispiness lies in using slightly sticky rice and a light coating of egg or panko before frying. This method ensures every bite has the perfect texture, making it a crowd-pleaser for any occasion.
Once fried to a golden brown, these rice balls are ready to be served immediately—crispy on the outside, fluffy and flavorful on the inside. They pair beautifully with a tangy dipping sauce, like soy-ginger or spicy mayo, which enhances the umami notes. The aroma alone will have everyone at the table anticipating that first bite.
Perfect for meal prep or last-minute gatherings, these fried rice balls are a foolproof way to elevate simple ingredients into something extraordinary. Let’s get started on creating these crispy, umami-packed bites that taste like a taste of Asia right in your kitchen.
Ingredients for asian fried rice balls
Crispy exteriors meet umami-packed centers—just 13 ingredients for these addictive Asian bites.
| Ingredient | Amount | Notes |
|---|---|---|
| Short-Grain White Rice 🍚 | 2 cups | Uncooked, slightly sticky variety |
| Large Eggs 🥚 | 2 whole | Room temperature for even coating |
| Japanese Mayonnaise 🥫 | ¼ cup | Kewpie preferred for authentic flavor |
| Japanese Panko Breadcrumbs 🍞 | ½ cup | Light and crispy for coating |
| Fresh Ginger 🌿 | 1 ½ tbsp | Finely grated, aromatic |
| Sesame Oil 🫒 | 1 ½ tbsp | Toasted for nutty aroma |
| Soy Sauce 🍶 | 2 tbsp | Light or all-purpose preferred |
| Rice Vinegar 🍶 | 1 tbsp | Mild flavor, not aged |
| Vegetable Oil 🫒 | 2 cups | High smoke point for frying |
| Green Onions 🧅 | 3 whole | Thinly sliced, white and green parts |
| Salt 🧂 | 1 tsp | Kosher or sea salt |
| Black Pepper 🌶️ | ½ tsp | Freshly ground for flavor |
| Pickled Plum Paste 🍒 | ¼ cup | Umeboshi for authentic umami |
The rice is non-negotiable here—short-grain white rice like Koshihikari or sushi rice gives that perfect sticky texture. Trader Joe's or Asian markets carry it pre-packaged, but if you're using regular rice, rinse it until the water runs clear to remove excess starch. The Kewpie mayonnaise is a game-changer too—its tangy sweetness balances the umami, and it's available at most grocery stores now. For the ginger, fresh is a must—the dried stuff just doesn't cut it here. Look for plump, firm ginger roots at the market, and grate it just before using for maximum aroma.
No Kewpie mayo? Hellmann's or Best Foods in a pinch, but add 1/2 tsp sugar to mimic the sweetness. Running out of panko? Toast regular breadcrumbs in the oven for 5 minutes at 350°F to dry them out. The pickled plum paste can be tricky to find—Asian grocery stores usually have it, or sub with 1 tbsp soy sauce plus 1/2 tsp sugar. For the green onions, freeze any extras in a sealed bag—they'll keep for months and still work perfectly. The vegetable oil is where you don't want to skimp—light olive oil has too low a smoke point for frying these properly.
Rice keeps 3 days in the fridge once cooked—make extra for fried rice or bowls. The panko stays fresh 2 weeks in an airtight container, while the ginger lasts 2 weeks wrapped in plastic. For meal prep, fry just what you need and store the dry rice balls in the fridge—re-fry for 1-2 minutes to restore crispiness. These freeze beautifully too—up to 3 months—just thaw before re-frying. The umami flavor actually deepens overnight, so leftovers often taste even better!
Why You'll Love This Recipe
- One-Pan Magic: I swear by this recipe when I’m too tired to wash dishes—just scramble the eggs, mix in cold rice, shape, and pan-fry. The panko gives that golden crunch without extra pans or mess.
- Creamy Crunch Perfection: That Japanese mayo and panko combo? It’s what makes this dish ridiculously good. The outside gets crispy, the inside stays tender, and the ginger adds just enough zing to keep it interesting.
- Lunchbox Hero: Between us, these are my go-to for packed lunches—stay fresh for days, reheat in seconds, and kids actually eat them. (Yes, even the picky ones.) The rice holds its shape, and the egg keeps it satisfying.
- Budget Meal Stretch: Short-grain rice and eggs are cheap staples, but they feel like a fancy takeout dish. I make a big batch on Sundays, freeze half, and still have leftovers that taste fresh—no sad, dry fried rice here.
Step-by-step instructions for Asian fried rice balls
Here's how to create perfectly crispy, umami-rich fried rice balls with a golden panko crust.
Cook and Season the Short-Grain White Rice
Rinse the 2 cups short-grain white rice under cold water until the water runs clear, then drain well. Cook the rice according to package instructions, but use slightly less water than recommended to achieve a stickier, more cohesive texture—this is crucial for binding the rice balls. Once cooked, spread the rice on a tray and let it cool completely to room temperature. This prevents steam from forming when you handle the rice later.
In a small bowl, mix together the 2 tablespoons soy sauce, 1 tablespoon rice vinegar, 1.5 tablespoons finely grated fresh ginger, 0.5 teaspoon black pepper, and 1 teaspoon salt. Gently fold this seasoning mixture into the cooled rice using a rubber spatula until evenly distributed. The rice should be moist but not sticky—if it feels too dry, add a teaspoon of water. This seasoned rice will form the flavorful core of your fried rice balls.
Prepare the Umami-Packed Filling
In a small bowl, combine the 0.25 cup pickled plum paste and 0.25 cup Japanese mayonnaise. The pickled plum paste adds that signature umami depth, while the mayonnaise binds everything together. Mix until smooth, then fold this mixture into the seasoned rice. The rice should coat the filling completely, creating a cohesive, flavorful mass. If the mixture feels too wet, add 1 tablespoon Japanese panko breadcrumbs to absorb excess moisture.
Divide the rice mixture into 4 equal portions (about ½ cup each) and shape each into a ball by gently rolling it between your palms. Place the balls on a plate and cover with plastic wrap. Chill in the refrigerator for at least 30 minutes—this firming step ensures the rice balls hold their shape during frying. Pro tip: Wet your hands slightly before shaping to prevent sticking.
Create the Crispy Panko Coating
In a shallow bowl, combine the 0.5 cup Japanese panko breadcrumbs, 1.5 tablespoons sesame oil, and 1 tablespoon rice vinegar. The panko should look lightly moistened but not soggy. Thinly slice the 3 green onions and set aside—you'll use them for garnish later. Remove the rice balls from the refrigerator and roll each one in the panko mixture, pressing gently to ensure an even, crispy coating. Place the coated balls on a wire rack set over a plate to catch any excess panko.
Heat 2 cups vegetable oil in a deep skillet or Dutch oven to 350°F. Use a thermometer to monitor the oil temperature—this precision is key to achieving a golden, crispy crust without burning. Fry the rice balls in batches of 2-3 at a time to avoid overcrowding, which can lower the oil temperature. Fry for 2-3 minutes per side until they turn a deep golden brown. The oil should bubble steadily around the balls, and they should float to the surface when ready.
Finish and Serve with Flavor
Transfer the fried rice balls to a paper towel-lined plate to drain excess oil. Let them rest for 2-3 minutes—this allows the crust to set and prevents them from becoming greasy. While they're resting, drizzle the top of each ball with a few drops of sesame oil for extra aroma. Garnish with the thinly sliced green onions, adding a pop of color and freshness that contrasts beautifully with the rich, umami flavors.
Serve the fried rice balls immediately while they're still crispy. The contrast of the golden panko crust with the tender, seasoned rice inside is what makes these bites so irresistible. Pair them with a side of spicy mayo or a tangy dipping sauce for the ultimate snack or appetizer experience. The secret to success? Keeping everything hot and serving right away—these don't wait!
Pro Tips For Making Asian Fried Rice Balls
- Chill the Rice First: Cold rice sticks together better—no mushy centers. Spread freshly cooked rice on a tray, let it cool completely, then refrigerate for at least 30 minutes before mixing. I used to skip this, and my rice balls always fell apart when frying. ---
- Scramble Eggs Dry: Overcooked eggs add moisture, so stop stirring when they’re just set—still slightly wet-looking. Use a nonstick pan and pull them off the heat right as they start to hold shape. My first few batches were soggy because I cooked the eggs too long. ---
- Press Panko Firmly: Don’t just sprinkle—pack the panko into the rice-egg mix with your hands until it sticks. This creates a solid crust that won’t crumble when frying. I learned this after watching my first batch disintegrate in the pan. ---
- Fry in Batches: Crowding the pan steams the rice balls instead of frying them. Use a 1-inch gap between balls and work in small batches—even if it takes longer. I burned two batches trying to rush it, and the results were greasy and uneven.
Serving suggestions for this recipe
Dipping Sauce Pairings
Serve these crispy rice balls with a spicy mayo made by mixing ¼ cup Japanese mayonnaise with 1 teaspoon sriracha and ½ teaspoon honey. The heat cuts through the richness while the sweetness balances the umami. For a tangy option, whisk 2 tablespoons rice vinegar, 1 tablespoon soy sauce, and 1 teaspoon sesame oil—this brightens every bite. 🌶️
Garnish Ideas
Top each fried rice ball with thinly sliced green onions for freshness, or sprinkle with toasted sesame seeds for nutty crunch. A drizzle of extra sesame oil right before serving adds an aromatic finish. For a pop of color, use red chili threads or micro cilantro leaves—both complement the golden crust beautifully.
Presentation Tips
Arrange the rice balls on a wooden platter or slate board for a rustic touch, and serve with small ceramic bowls of dipping sauce. For a festive look, scatter edible flowers or crushed seaweed flakes around the platter. Keep them warm in a low oven (200°F) while serving to maintain crispiness. ✨
Meal Pairings
These rice balls make an excellent appetizer before a main course, or serve them as a light lunch with a simple miso soup and steamed greens. For a full meal, pair with grilled salmon or teriyaki chicken—the umami flavors complement perfectly. They also shine as a party snack alongside edamame and spring rolls.
Customizable Toppings
Add crumbled furikake for a salty, savory kick or shredded nori strips for oceanic notes. For a sweet contrast, sprinkle with kinako (roasted soybean flour) or matcha powder. These toppings elevate the dish while keeping prep simple—just toss them on right before serving. 💫
Make-Ahead Serving
Fry extra rice balls and store them in an airtight container at room temperature for up to 2 days. Reheat in a skillet with 1 tablespoon oil over medium heat for 1-2 minutes to restore crispiness. For a freezer-friendly option, freeze uncoated rice balls, then fry from frozen—add 30 seconds per side to cooking time. Perfect for meal prep! ⏰
Nutrition facts
Frequently asked questions
Can I use regular white rice instead of short-grain rice?
Regular white rice won't give you that perfect sticky texture needed for shaping. The short-grain variety binds better and holds together during frying. If you're desperate, try sushi rice or even jasmine rice as a close substitute—just rinse it extra well to reduce starch.
How do I keep the rice balls from falling apart when frying?
Chill the shaped rice balls for at least 30 minutes before coating—the cold helps them firm up. Wet your hands slightly when shaping to prevent sticking, and don't overmix the filling. Too much moisture = crumbly balls. Press gently when coating with panko for even adhesion.
What's the best way to reheat leftover fried rice balls?
Reheat in a skillet with 1 tablespoon oil over medium heat for 1-2 minutes per side until crispy again. Microwaving makes them soggy—always use dry heat. For extra crunch, sprinkle with fresh panko before reheating. Leftovers stay crispy for 2 days at room temp.
Can I make these rice balls without frying?
Yes! For a baked version, brush shaped rice balls with oil and bake at 400°F for 15-18 minutes until golden. They'll be less crispy but still delicious. Air fry at 375°F for 8-10 minutes for a middle-ground texture. The filling will still be flavorful either way!
What's the secret to getting extra crispy crusts?
Use Japanese panko (it's lighter than regular breadcrumbs) and keep your oil at 350°F. Press the rice balls firmly into the panko coating, and fry in small batches to maintain oil temperature. A quick dip in egg wash before panko adds extra crunch. Don't skip the resting time after frying!